FAQ
Precios y prueba
WaiterOne para iPad cuesta solo €20 o 19 CHF al mes (cuando se paga de forma anual). No hay COSTOS ocultos. No te cobramos por las actualizaciones, ni por los servicios de ningún tipo. Instala la aplicación en tu iPad y comienza a usarla de inmediato. También tenemos nuestra aplicación WaiterOne Remote para iPhone y iPod, totalmente gratis. El KDS (display de cocina) también está disponible de forma gratuita. En realidad, todas las aplicaciones y servicios que pertenecen a WaiterOne son gratuitos para instalar y usar. ¿Aún piensas que WaiterOne es caro?
El precio todo incluido de WaiterOne será tan bajo como 20 euros al mes (pagado anualmente). Todas las aplicaciones, complementos y servicios estarán incluidos. Aquí hay una lista de lo que obtienes por tu dinero:
- Aplicación WaiterOne para iPad
- Nuestro famoso soporte, ahora todos son V.I.P.
- Tantos mandos a distancia WaiterOne para iPhone, iPod y iPad como quieras
- Tantos KDS como quieras: sistema de visualización de cocina (o bar)
- Panel de control en la nube: ve tus ventas en tiempo real desde donde estés
- Copia de seguridad en la nube: guarda tu configuración en línea en nuestra nube
- Sistema de pedidos de clientes: deja que tus clientes pidan desde casa o en tu negocio
- Actualizaciones para todas las aplicaciones
Por ese precio mensual puedes usar tantos mandos a distancia como quieras, así que ahora cada camarero podría tener un mando a distancia realmente. Lo mismo ocurre con el KDS. Empezar nunca ha sido tan asequible. 20,- Euro, todo incluido.
También puedes pagar por 1, 3 o 6 meses. Así que si tienes un negocio de temporada o de eventos, solo tienes que pagar por el período en que usas el sistema.
También puedes instalar una versión de prueba de WaiterOne. Podrás probar todas las increíbles funciones de WaiterOne sin límites.
Si tienes preguntas sobre este cambio, no dudes en contactarnos. Siempre disponibles, siempre listos para ayudar.
Efectivamente, €20 al mes es un precio verdaderamente razonable. Con WaiterOne, no necesitarás hardware adicional costoso, como una pantalla táctil de €500/$500 o una PC lenta y problemática que se bloquea después de las actualizaciones de seguridad o problemas de disco. Tampoco necesitarás software costoso, como un módulo de oficina central que se ejecute en un servidor SQL excesivamente caro. Tampoco necesitarás un contrato de soporte engorroso; no enviaremos ingenieros costosos para reparar ventiladores rotos y no tendrás que pagar por las actualizaciones mensuales.
En WaiterOne, evitamos los adornos extravagantes o las tácticas de venta llamativas. En su lugar, nos enfocamos en proporcionar una experiencia fluida con la combinación perfecta del software WaiterOne y hardware confiable: el iPad, iPhone y iPod. Nuestro sistema está diseñado para funcionar impecablemente sin necesidad de soporte constante, lo que nos distingue de otras soluciones de punto de venta.
Por supuesto, si tienes dudas, no te preocupes, lo entendemos. Si encuentras una solución de punto de venta más cara para tu negocio, estamos seguros de que pronto te darás cuenta del valor inigualable y la asequibilidad que ofrece WaiterOne.
Primeros pasos
SÍ, la hay: puedes descargar WaiterOne gratis desde la App Store. Todas las funciones funcionarán. Así que simplemente descarga WaiterOne y comienza a probarlo.
Sí. Estas guías están disponibles:
- Manual en línea: Manual en línea de WaiterOne
- Primeros pasos: GettingStartedWithWaiterOne.pdf
- Sistema de Pedidos de Clientes (COS): COS.pdf
- Módulo TSE: TSE.pdf
- Configuración de Fiskaly: Fiskaly_in_WaiterOne.pdf
- Tap to Pay: Tap_to_Pay_WaiterOne.pdf
- Activación FDM Bélgica: Belgium_FDM_Activation_Guide.pdf
Los comentarios sobre las guías siempre son bienvenidos.
WaiterOne funciona exclusivamente en tu iPad, lo que elimina la necesidad de una conexión a internet en tu bar o restaurante. Esto no solo ofrece comodidad, sino que también es una ventaja significativa sobre muchos de nuestros competidores. Incluso si te encuentras en movimiento, sirviendo gofres o hamburguesas desde tu food truck, WaiterOne te tiene cubierto. Con nosotros, tus datos siempre están accesibles, asegurando operaciones sin problemas incluso cuando la conexión a internet está lenta o no disponible. Todo continúa funcionando a la misma velocidad increíble, garantizando un servicio ininterrumpido.
Creemos que todos deberían tener un iPod Touch o iPhone con WaiterOne como su sistema personal de pedidos. Por eso lo hemos hecho gratuito para que lo disfrutes y te diviertas usándolo. De hecho, desde principios de 2017, todos los complementos y aplicaciones de WaiterOne son gratuitos, incluyendo todo. Es muy conveniente para nosotros, sin gastos administrativos, y también es muy económico para ti.
Puede conectar tantos mandos a distancia como desee (¡¡gratis!!). No hay límite de software.
Pedidos y configuración
Debes seguir estos pasos:
- 1. Descarga WaiterOne Remote para iPad/iPhone/iPod desde la Apple AppStore.
- 2. Conecta tu iPad/iPhone/iPod a tu red local. Asegúrate de que tu dispositivo esté dentro del mismo rango que tu iPad principal o punto de acceso.
- 3. Habilita el servidor Remoto en tu iPad en Configuración -> WaiterOne Remote. Aquí también verás la dirección IP de tu iPad principal, ya que es posible que necesites configurar tu Remote.
- 4. Abre WaiterOne Remote en tu iPad/iPhone/iPod, ve a configuración, y tu iPad debe aparecer en el campo de host. Si no es así, ingresa aquí la dirección IP de tu iPad principal de WaiterOne. Ingresa tu código de camarero, haz clic en descargar, y deberías ver cómo se descargan los botones de tu iPad principal.
- 5. Si la descarga no funciona, ve a la configuración de tu iPad principal de WaiterOne (no a la configuración de WaiterOne). En la parte inferior izquierda, también hay algunas configuraciones para WaiterOne. Asegúrate de que la red local esté activada y la ubicación esté configurada como 'siempre'. Actívalo e intenta nuevamente. Haz lo mismo en la configuración de tu Remote, activa la red local si no funciona.
Estamos utilizando un protocolo llamado 'Bonjour'. A veces, su punto de acceso lo bloquea o simplemente no se transmite / recibe correctamente. Verifique si no tiene un firewall en funcionamiento en su punto de acceso. Un cliente señaló que cambiar el 'ancho de canal' a automático resolvió su problema. ¡Imagínate eso! También puedes ingresar la dirección IP de tu iPad principal en la configuración de tu control remoto. Consulte la pregunta frecuente anterior.
Hay muchos malentendidos sobre esto. Y otros vendedores de TPV usan esto para decir que están aprobados. Pero no existe tal aprobación para Alemania. Pronto tendremos una versión alemana de WaiterOne, en este caso todos los datos estarán encriptados. Eche un vistazo a esto y vuelva a usar si las cosas aún no están claras.
No hay un certificado oficial necesario, pero las reglas son estrictas. WaiterOne se esfuerza por cumplir con todas las regulaciones locales.
WaiterOne 1.8 es conforme al FDM de Bélgica. Póngase en contacto con nosotros si desea saber más.
¡Sí y no! Debido a algunas leyes de cifrado estúpidas de Estados Unidos, no ciframos los datos en WaiterOne. Por lo tanto, tus datos no están cifrados y pueden ser leídos por cualquiera que los obtenga. Al final del día, puedes borrar todas tus ventas, así que puedes empezar de nuevo al día siguiente. Nada de qué preocuparse.
Copia de seguridad y datos
Si desea transferir WaiterOne a otro iPad, aquí está el procedimiento:
- Descargue WaiterOne desde la AppStore de Apple en su nuevo iPad.
- Instale una cuenta de correo electrónico en ambos iPads si desea transferir su base de datos por correo electrónico. Active el Bluetooth si desea transferir su base de datos con AirDrop (AirDrop no funciona en dispositivos más antiguos).
- En el antiguo iPad, vaya a Configuración -> Datos -> Copia de seguridad y haga clic en Copia de seguridad, seleccione Correo electrónico o AirDrop. Si desea transferir su base de datos por correo electrónico, deberá tener un cuenta de correo electrónico instalada en ambos iPads. Una página web de correo electrónico en línea no funcionará. Si desea transferir con AirDrop, necesitará iPads compatibles y ambos iPads deben tener el Bluetooth activado.
- En el nuevo iPad, si está trabajando con correo electrónico, haga clic durante 2 segundos en el archivo w1.db.zjp y envíelo/cópielo a WaiterOne. Con AirDrop, puede enviarlo/copiarlo de inmediato a WaiterOne.
- El nuevo iPad debería reiniciar WaiterOne. Una vez que haya terminado, contáctenos ya que necesitamos transferir su licencia.
La base de datos es visible en iTunes o en su Mac (compartir archivos), puede arrastrar w1.db, soltarlo y guardarlo en su Mac o PC con fines de copia de seguridad.
También hemos agregado una función de copia de seguridad en la sección 'Configuración' de WaiterOne. En Configuración -> Datos -> Copia de seguridad. De esta manera, puede hacer una copia de seguridad de sus datos enviándose un correo electrónico con la copia de seguridad adjunta o puede hacer una copia de seguridad de sus datos en la nube.
En la última versión de WaiterOne, también puede activar la copia de seguridad automática en el cloud. De esta manera, no olvidará hacer una copia de seguridad de sus datos.
La base de datos se puede restaurar de 2 formas diferentes:
con el correo electrónico configurado en tu iPad, puedes abrir el archivo de la base de datos w1.db directamente. Solo haz clic unos segundos en el archivo zip w1.db, se abrirá una ventana emergente, luego selecciona 'Copiar en WaiterOne‘
Abrir en WaiterOne
Copiar en WaiterOne
con iTunes (Compartir archivos), puedes arrastrar la base de datos previamente almacenada w1.db desde tu Mac o PC a iTunes. Así es cómo:
- Conecta tu iPad a tu Mac o PC,
- Abre iTunes (si aún no está abierto),
- Haz clic en tu iPad recién conectado en iTunes,
- Haz clic en Aplicaciones,
- Desplázate hacia abajo hasta que veas 'Compartir archivos',
- Haz clic en WaiterOne,
- Ahora arrastra y suelta el archivo w1.db desde donde lo hayas almacenado, a los documentos de WaiterOne. También puedes hacer clic en el botón Agregar… en caso de que el arrastrar y soltar sea demasiado complicado,
- (Re)inicia WaiterOne.
Si ingresas un código incorrecto más de 3 veces, se creará un archivo llamado 'passwords.txt'.
En tu Mac, abre Finder y ve a tu iPad, ve a Archivos y haz clic en WaiterOne. En PC, tendrás que usar el programa iTunes.
Deberías encontrar un archivo llamado 'passwords.txt' allí. Cópialo en tu Mac o PC. Ese archivo se puede abrir con cualquier editor. Debería haber una lista de usuarios y contraseñas en él.
También puedes copiar el archivo 'w1.db' en tu Mac o PC y enviárnoslo por correo electrónico para que podamos desbloquearlo.
Sí. Puedes cambiar la longitud de los códigos de usuario, y también puedes configurar WaiterOne para que los usuarios no cierren sesión automáticamente después de cierto número de segundos.
Si no quieres escribir un código, puedes usar el inicio de sesión con código QR:
- Ve a los ajustes de WaiterOne, pulsa barcode, activa software barcode, usa la cámara frontal y activa blind mode.
- Ve a Data -> Users, selecciona el usuario y pulsa el botón QR Code junto al código.
- Cierra sesión y coloca el código QR delante de la cámara del iPad para iniciar sesión.
También puedes usar biometría para entrar como administrador.
Botones y mesas
En lugar de trabajar con filas y columnas y tener que memorizarlas, puedes arrastrar y soltar botones cuando los mantienes pulsados un poco más que un toque normal. Pruébalo, es divertido.
También puedes añadir más filas y columnas arrastrando un botón a la fila plus o a la columna plus. Si lo necesitas, también puedes arrastrar botones a otras páginas.
El tamaño de los botones en WaiterOne es calculado por la propia aplicación. No tienes que especificar cuán grande o pequeño debe ser un botón. Todo depende del número de filas y columnas que tengas en tus páginas. Cuantas más filas o columnas tengas, más pequeños serán los botones.
Hay un par de formas de trabajar con mesas en WaiterOne. Puedes ver una lista de mesas cuando haces clic en el total en la esquina superior derecha, o puedes trabajar con una visualización de las mesas. Lo llamamos plan de mesas de la vieja y la nueva escuela. El plan de mesas de la vieja escuela es simplemente una lista de mesas ordenadas por nombre. El plan de mesas de la nueva escuela es como aparece en tu negocio. Para cambiarlo, ve a tus ajustes en WaiterOne (ajustes -> ajustes generales -> mesas -> plan de mesas).
Puedes mover una mesa desde varios lugares. En el plano visual de mesas new-school, haz clic en una mesa y arrástrala hasta otra mesa. Así se transferirán todos los pedidos a la otra mesa.
Ahora esto también funciona con el plano de mesas old-school. También puedes mover una mesa desde la lista de mesas/clientes: haz clic en el total en la esquina superior derecha de la pantalla principal del POS para abrir la lista y mueve la mesa desde allí.
¿Conoces esos eventos donde la gente compra entradas en un mostrador y luego recoge sus bebidas en otro lugar? Bueno, ¡WaiterOne también puede hacer eso!
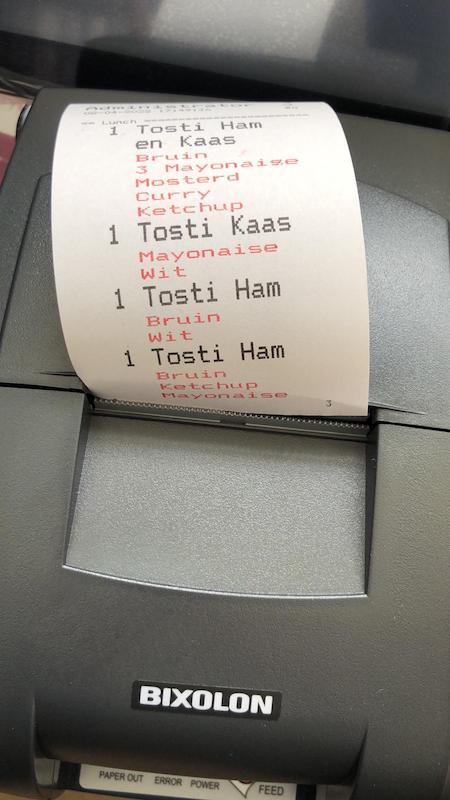
En las impresoras puedes configurar un parámetro para imprimir un ticket por cada producto que hayas pedido. Imagina que tienes un cliente que quiere pagar por 5 bebidas. WaiterOne imprimirá 5 vales para tu cliente, él los puede canjear en el bar cuando quiera.
Echa un vistazo a esta configuración (datos -> impresoras -> tickets -> separación entre productos):
Impresoras e impresión
Tantas como desees, siempre hemos probado con 3 impresoras, una en el bar, otra en la cocina y otra para imprimir las facturas. Si quieres, también puedes usar 1 impresora para 2 lugares diferentes, digamos que el bar y el lugar donde quieres tus recibos no están tan lejos el uno del otro. Prueba con una impresora primero, pero crea 2 impresoras en WaiterOne, de esa manera WaiterOne imprimirá 2 tickets en la misma impresora, uno para el bar y otro para el recibo. Si no estás satisfecho con el resultado, agrega otra impresora, así de fácil.
Puede conectar una impresora de tickets a WaiterOne si tiene una interfaz Ethernet, Bluetooth o Wi-Fi, USB/Lightning solo funciona con las últimas impresoras Star TSP143III USB y Epson TM-m30II-NT, serie y paralelo no funcionarán o deberá usar un servidor de impresión o un dongle intermedio. Normalmente (cuando se usa Ethernet o Wi-Fi) debe conectar su impresora a su punto de acceso y configurarla para que tenga una dirección IP en el mismo rango de red que su punto de acceso y iPad. No configure su impresora (y iPad) con DHCP, ya que su dirección IP cambiará de vez en cuando, lo que dará problemas de conexión después. Si no sabe qué es una dirección IP, haga que la configure un ingeniero informático (o envíenos un correo electrónico).
Si tiene problemas para conectar su impresora Epson a su red. Utilice la utilidad EpsonNet Config (PC y Mac). Puede configurar su impresora usando un cable USB primero y probarla en su red. Este es el enlace a la página de Epson para esa utilidad.
Epson tiene una aplicación increíble para configurar su impresora, por favor, compruébelo: Epson TM Utility
*La Epson™ TM-T88V con interfaz Wi-Fi tiene una característica muy interesante para que no necesite un punto de acceso. Puede conectar su iPad al EpsonNetIBSS ad-hoc o al SSID EpsonNet directamente. Incluso puede agregar otros dispositivos a él. La dirección IP predeterminada de la impresora es 192.168.192.168. Conclusión: 1 impresora Epson con Wi-Fi + 1 iPad con WaiterOne. ¡Nada más! ¡Sin cables (excepto para la corriente de su impresora)! ¡Encantador! ¡IMPRESIONANTE!
¡Sí, puedes! Puedes usar una impresora normal de inyección de tinta o láser (compatible con AirPrint) para imprimir facturas bonitas para tus clientes (por ejemplo, un hotel o un restaurante con estrella Michelin). También puedes usarla para imprimir tus resultados. Para obtener una lista de impresoras compatibles, consulta el sitio web de Apple o busca AirPrint en Google. Usamos una impresora All-in-One de $80 de HP, ¡simplemente perfecta!
Hemos probado WaiterOne con las impresoras de tickets Epson™. Las Epson™ TM-T88IV y TM-T88V, tanto Wi-Fi como LAN (ethernet), funcionaron perfectamente. Puedes usar otra marca si son compatibles con Epson™ y tienen interfaz ethernet, Wi-Fi o Bluetooth*. Si has conectado otra marca o si tienes problemas para conectarla, avísanos. Por favor, contáctanos antes de comprar una impresora, no seas un héroe, no queremos que compres una impresora que simplemente no funcione en absoluto.
Aquí tienes una lista de impresoras compatibles con WaiterOne:
Epson:
- Epson™ TM-T20, TM-T20II y TM-T20III: al fin una impresora de punto de venta de bajo presupuesto con interfaz ethernet
- Epson™ TM-T70II: interfaz ethernet y Wi-Fi
- Epson™ TM-T88III, TM-T88IV, TM-T88V, TM-T88VI, TM-T88VII, TM-T90, TM-T82 y TM-T82II
- Epson™ TM-m30: una nueva impresora fantástica de Epson
- Epson™ TM-U220: esta es una impresora matricial, ideal si quieres una impresora de cocina antigua
- Epson™ TM-m30
- la nueva impresora de punto de venta Epson™ TM-m30
Las llamadas impresoras 'inteligentes' de Epson no funcionan con WaiterOne. Así que por favor, no inviertas en una TM-T88V-i u otra impresora Epson donde se añada una 'i' al nombre. WaiterOne no necesita impresoras inteligentes, lo único que necesitan es imprimir, el pensamiento real lo hace WaiterOne 😉
La aplicación Epson TM Utility tiene todas las herramientas para configurar tu impresora Epson. Por favor, échale un vistazo: Epson TM Utility
Citizen:
- Citizen™ CT-S310II
- Serie Citizen™ CT-S600
- Serie Citizen™ CT-S800: Estas impresoras tienen una pantalla LCD, y logramos usarla como pantalla de cliente. ¡Muy impresionante y útil!
Star:
- Star™ TSP650, TSP650II: ethernet y Bluetooth
- Star™ TSP143: tienen una nueva versión de esta impresora que funciona con el cable Lightning de tu iPad
MPOS:
- MPOS-TP220I: parece funcionar, según algunos clientes
- Bixolon SRP350IIE: debería funcionar, (todavía) esperando un modelo para probar aquí
Rongta:
- Rongta RP80 o RP80W: ¡la versión Wi-Fi es muy asequible!
- Rongta RPP300: impresora portátil Bluetooth y Wi-Fi (en prueba)
Metapace:
- Metapace T-3: parece funcionar, según algunos clientes
Sam4s:
- Giant-100: versión Wi-Fi funciona. Necesitas cambiar el puerto de 5000 a 9100. Hay una herramienta del fabricante para hacer esto.
WaiterOne:
- KDS: ¿No te gusta una impresora, supongo que quieres salvar un árbol? Mira nuestro KDS.
*¿Tienes una vieja impresora POS USB (o compraste la impresora equivocada y solo tiene interfaz USB)? Entonces todavía hay esperanza para ti. Algunos routers/puntos de acceso tienen una interfaz USB que se puede utilizar para conectar tu impresora. Un cliente hizo funcionar su antigua Metapace T-3 con interfaz USB en un FRITZ!Box 7930 🙂 O, nuevamente, a partir de ese mismo cliente, opta por un Servidor de Impresión Inalámbrico (como el TP-Link TL-WPS510U Wi-Fi a USB) e instala tu impresora USB de forma inalámbrica en tu cocina.
**Supongo que un Apple Airport Express con USB también debería funcionar. Necesito probar ese una vez. Si lo tienes, avísanos!
WaiterOne necesita una impresora que esté conectada a su red o a su iPad. Por lo tanto, su impresora debe tener una interfaz Ethernet, una interfaz Bluetooth o una interfaz Wi-Fi. Algunas impresoras también tienen una interfaz especial para iPad con Lightning. Así que por favor pregúntenos antes de invertir en una impresora.
Mantén presionado el botón 'pair' en la parte posterior de tu impresora durante 5 segundos, el LED comenzará a parpadear. Ahora tienes 60 segundos para emparejar tu impresora en la configuración -> Bluetooth de tu iPad. Por favor, descarga StarIO SDK desde la App Store de Apple e intenta conectarte a tu impresora, también configura 'Auto Connect' en tu configuración de Bluetooth.
De uno de nuestros clientes. Gracias a Ingemar V.
- Descargue Star Utility/Setting desde la App Store.
- Apague una de las impresoras.
- En la aplicación Star Utility (o Configuración), cambie el nombre de Star Micronics a Star Micronics2 (o cualquier otro nombre).
- En datos -> impresoras cambie el nombre a Star Micronics2. Encienda la otra impresora y conéctela en datos -> impresoras -> bar con Star Micronics y cocina con Star Micronics2.
Asegúrate de tener el nombre de tu impresora encontrado en la aplicación StarPRNT SDK (el mío era TSP654). Completa ese nombre en el campo Host de tu impresora (datos -> impresoras), pero agrega 'BT:' delante (deberías tener por ejemplo BT:TSP654). Configura el 'Tipo de impresora' en Modo de línea Star. Desactiva la Fuente grande, establece Caracteres A en 48, Caracteres B en 64.
También configura la página de códigos de esta impresora Star en 32 en WaiterOne. De lo contrario, algunos caracteres no se imprimirán correctamente (por ejemplo, el símbolo €).
PD: Algunos clientes tuvieron problemas con el nombre original de la impresora, una vez cambiado de StarMicronics a por ejemplo TSP654, todo funcionó perfectamente.
Star lanzó esta impresora POS USB única que funciona con el iPad (y WaiterOne): el Star TSP143IIIU. Lo bueno de esta impresora es que no necesitas una red ni habilidades informáticas para instalarla.
- 1. Conecta tu impresora a tu iPad con tu cable Lightning (USB en el lado de la impresora, Lightning en el lado del iPad).
- 2. En WaiterOne ve a datos -> impresora -> factura -> general -> host e ingresa: USB:TSP100
- 3. En los mismos ajustes que arriba, selecciona Star Raster Mode como tipo de impresora.
¡Todo listo! Presiona el código QR junto a la dirección del host en WaiterOne y debería imprimirse un pequeño ticket.
33. ¿Cómo conecto la Epson TM-m30II-NT con un cable Lightning a mi iPad y la configuro en WaiterOne?
- 1. Conecta tu impresora a tu iPad con tu cable Lightning (USB en el lado de la impresora, Lightning en el lado del iPad).
- 2. Ahora necesitamos encontrar el número de serie USB de tu impresora. Se puede encontrar imprimiendo una página de prueba (enciende la impresora mientras mantienes presionado el botón de avance) o instalando la aplicación Epson TM Utility (disponible en la App Store de Apple). Cuando ejecutas esa aplicación y buscas tus impresoras conectadas, aparecerá el número de serie. ¡El número de serie tiene 18 caracteres!
- 3. En WaiterOne, ve a datos -> impresoras -> factura -> general -> host e ingresa: USB + número de serie (por ejemplo, USB:5839394E0004360000)
- 4. En los mismos ajustes que arriba, selecciona Epson ePOS SDK como tipo de impresora.
¡Todo listo! Toca el código QR junto a la dirección del host en WaiterOne y debería imprimirse un pequeño ticket.
Por favor, también comprueba si la marca de tu impresora no tiene una aplicación para hacer el trabajo. Epson tiene esta utilidad aquí: Epson TM Utility
Método alternativo para configurar tu impresora (me gusta mucho este método, pero de nuevo, soy un desarrollador de software ;))
macOS en una computadora Apple: Abre la terminal y escribe:
- sudo arp -d [Dirección IP temporal de la impresora]
- sudo arp -s [Dirección IP temporal de la impresora] [Dirección MAC de la impresora]
- ping -c 4 [Dirección IP temporal de la impresora]
Windows: Abre el símbolo del sistema y escribe (ejecútalo como administrador, ve a la caja de ejecución, escribe cmd y luego presiona control + shift + enter)
- arp -d [Dirección IP temporal de la impresora]
- arp -s [Dirección IP temporal de la impresora] [Dirección MAC de la impresora]
- ping -n 4 [Dirección IP temporal de la impresora]
Ejemplo en Windows, al cambiar la dirección IP de la impresora a 192.168.0.168:
- arp -d 192.168.0.168
- arp -s 192.168.0.168 00-26-ab-d5-b9-84
- ping -n 4 192.168.0.168
Ejemplo en Apple, al cambiar la dirección IP de la impresora a 192.168.0.168:
- sudo arp -d 192.168.0.168
- sudo arp -s 192.168.0.168 00:26:ab:d5:b9:84
- ping -c 4 192.168.0.168
La dirección MAC de la impresora se puede encontrar en la página de prueba de la impresora. Enciende la impresora mientras mantienes presionado el botón de avance.
Configure la página de códigos en 18 (en lugar de 16) en datos -> impresoras. Para la Epson m30II con conexión lightning, incluso puede configurar la página de códigos en 24(!) y el juego de caracteres en 2.
Aquí está la lista completa:
Página de códigos
0 PC437: EE. UU., Europa estándar
1 Katakana
2 PC850: Multilingüe
3 PC860: Portugués
4 PC863: Francés canadiense
5 PC865: Nórdico
11 PC851: Griego
12 PC853: Turco
13 PC857: Turco
14 PC737: Griego
15 ISO8859-7: Griego
16 WPC1252 *** estándar para ESP/POS
17 PC866: Cirílico #2
18 PC852: Latin2 *** estándar para ePOS SDK
19 PC858: Euro
20 KU42: Tailandés
21 TIS11: Tailandés
26 TIS18: Tailandés
30 TCVN-3: Vietnamita
31 TCVN-3: Vietnamita
32 PC720: Árabe
33 WPC775: Báltico
34 PC855: Cirílico
35 PC861: Islandés
36 PC862: Hebreo
37 PC864: Árabe
38 PC869: Griego
39 ISO8859-2: Latin2
40 ISO8859-15: Latin9
41 PC1098: Farsi
42 PC1118: Lituano
43 PC1119: Lituano
44 PC1125: Ucraniano
45 WPC1250: Latin2
46 WPC1251: Cirílico
47 WPC1253: Griego
48 WPC1254: Turco
49 WPC1255: Hebreo
50 WPC1256: Árabe
51 WPC1257: Báltico
52 WPC1258: Vietnamita
53 KZ-1048: Kazajistán
255 Página definida por el usuario
Juego de caracteres
0 EE. UU.
1 Francia
2 Alemania
3 Reino Unido
4 Dinamarca I
5 Suecia
6 Italia
7 España I
8 Japón
9 Noruega
10 Dinamarca II
11 España II
12 América Latina
13 Corea
14 Eslovenia/Croacia
15 China
16 Vietnam
17 Arabia
Configure la página de códigos en 32 (en lugar de 16) en datos -> impresoras. Configure el tipo de impresora en Modo de línea Star.
Para la Star mC-Print3, configure los caracteres del tipo de letra A en 48 y del tipo de letra B en 64. Para su versión más pequeña, la mC-Print2, configure los caracteres del tipo de letra A en 32 y del tipo de letra B en 42. No hemos probado personalmente la Star mC-Print2. ¡Por favor, avísenos si todo funciona bien!
Hemos probado WaiterOne con la impresora de tickets móvil Citizen™ CMP-30 y Epson™ TM-P60. Muy compactas, robustas y potentes. No pudimos conectar nuestra app a la versión Bluetooth, pero la versión Wi-Fi funcionaba perfectamente. Actualización: estamos reprobando WaiterOne actualmente con un par de impresoras Bluetooth. ¿Necesitas más información? Contáctanos.
Agregar un logotipo a tus tickets puede mejorar mucho la apariencia de tus recibos. Por supuesto, necesitas una versión digital de tu logotipo de empresa. Dependiendo de la impresora, el tamaño de un logotipo puede ser de hasta 512 píxeles (Epson TM-T88) o 576 píxeles (Epson TM-T20) de ancho. Va más allá del alcance de esta FAQ, pero podrías necesitar algunas habilidades básicas de dibujo en computadora para ajustar tu logotipo al tamaño correcto. La mayoría de las aplicaciones predeterminadas de dibujo/pintura que encontrarás en tu computadora deberían hacer el trabajo, no es necesario dominar Photoshop u otros programas similares. Si buscas un editor de pintura en línea, seguramente encontrarás algunas herramientas en línea para editar tu logotipo.
Dependiendo de la marca (y/o modelo) de tu impresora, puedes hacer lo siguiente. Si tu impresora no está listada o no funciona, avísanos. Recuerda seleccionar el tipo de impresora (= controlador) correcto en WaiterOne (Datos -> Impresoras -> ... -> General -> Tipo de impresora). Si eres un fabricante de impresoras y quieres que tu impresora esté aquí listada, avísanos, y/o tal vez préstanos una impresora para que podamos integrarla y probarla completamente con WaiterOne.
A: Epson™ (la mayoría de los modelos, pero estamos probando con Epson TM-T88V con Wi-Fi):
Epson tiene una aplicación útil (y más) llamada Epson TM Utility. Descarga esta aplicación en tu iPad.
Primero carga tu logotipo de empresa (o cualquier imagen que quieras imprimir) en tu impresora de tickets. Va más allá del alcance de esta FAQ explicar cómo usar esa utilidad, pero deberías cargar tu logotipo en el primer lugar de la imagen, es decir, (32,32).
En WaiterOne, en Configuración -> General -> Encabezado (o pie de página) del ticket, agrega el siguiente código: <logo>. También puedes agregar un segundo logotipo usando <logo2> (32,33).
B: Star™ en Modo Línea (por ejemplo, Star TSP650II):
Primero carga tu logotipo de empresa (o cualquier imagen que quieras imprimir) en tu impresora de tickets. Descarga e instala la Utilidad de Impresora Star™ Micronics (consulta www.starmicronics.com y selecciona tu impresora), el software está disponible solo para Windows. Una vez iniciado, haz clic en Logo Store. Carga tus logotipos, tu primer logotipo debería tener el Código Clave 01, tu segundo logotipo 02, y así sucesivamente.
En WaiterOne, en Configuración -> General -> Encabezado (o pie de página) del ticket, agrega el siguiente código: <logo>. También puedes agregar un segundo logotipo usando <logo2>. Si deseas agregar más de 2 logotipos, entonces debes agregar tus propias marcas, el logotipo3 debería ser <27,28,112,3,48> (donde 3 es el tercer logotipo).
C: Star™ en Modo Raster (por ejemplo, Star TSP143III):
Carga tu logotipo de empresa (o cualquier imagen que quieras imprimir) en la carpeta de intercambio de archivos de WaiterOne en tu iPad. El logotipo debe tener el nombre del nombre de la impresora que utilizaste en datos -> impresora en letras minúsculas. Por ejemplo, si quieres un logotipo en tu impresora de facturas, llámalo bill.png.
ACTUALIZACIÓN PARA VERSIÓN 1.5: La imagen debe tener exactamente el mismo nombre que el nombre de la impresora. Así que si tu impresora se llama Bill, entonces la imagen debería llamarse Bill.png, si tu impresora se llama Kitchen, debería ser Kitchen.png. De hecho, también puedes imprimir un logotipo en los tickets de pedido.
D: Xiamen Rongta Technologies™ (por ejemplo, RP80W y RPP300):
Primero carga tu logotipo de empresa (o cualquier imagen que quieras imprimir) en tu impresora de tickets. Usa el software de Rongta Tech para esto. El software es un poco difícil de usar, no hay comentarios si cargas un logotipo. Además, solo funciona para Windows.
En WaiterOne, en Configuración -> General -> Encabezado (o pie de página) del ticket, agrega el siguiente código: <28,112,1,48>. También puedes agregar un segundo logotipo usando <28,112,2,48>. Hemos agregado una etiqueta de marcado especial para ello, a partir de la versión 1.3.17 puedes usar <printlogo> y <printlogo2> en lugar de los feos códigos hexadecimales.
El logotipo también funciona en la impresora portátil Rongta RPP300. Sin embargo, hay una diferencia, ¡el logotipo no parece estar centrado! No debería ser un problema, simplemente agrega algo de espacio en blanco antes de él y todo debería estar bien.
E: Citizen™ (por ejemplo, Citizen CT-S851):
Primero carga tu logotipo de empresa (o cualquier imagen que quieras imprimir) en tu impresora de tickets. Usa el software de Citizen llamado Citizen POS Printer Utility (consulta www.citizen-systems.com y selecciona tu impresora). Usa primero el botón 'Modo de cambio' para configurar el modo en 'Modo de código clave no utilizado' y nombra tu primer logotipo 01. El software es bastante impresionante y es uno de los más avanzados que hemos visto hasta ahora para configurar una impresora.
En WaiterOne, en Configuración -> General -> Encabezado (o pie de página) del ticket, agrega el siguiente código: <28,112,1,48>. También puedes agregar un segundo logotipo usando <28,112,2,48>. Hemos agregado una etiqueta de marcado especial para ello, a partir de la versión 1.3.17 puedes usar <printlogo> y <printlogo2> en lugar de los feos códigos hexadecimales.
Mantén presionado el botón de avance mientras enciendes la impresora. ¿Verifica si tu tarjeta está allí? Si no, presiona más de 1 segundo. Luego, ve a los diferentes menús, pequeñas presiones para indicar qué elemento de menú quieres, 1 segundo para seleccionarlo: 11 (Configuraciones de interfaz USB) -> 1 (Clase) -> 1 (Clase de proveedor). Guarda todo presionando durante 1 segundo repetidamente hasta que salgas del menú.
Sí. Pon el número de copias de la impresora de tickets correspondiente en 0 (Data -> Printers). WaiterOne omitirá el ticket por defecto.
Cuando necesites un ticket, tienes varias opciones: pedir una copia del ticket en la pantalla principal, pulsar el botón Tickets en los botones especiales, o mantener pulsado el botón de cuenta/pago para invertir el comportamiento por defecto e imprimir un ticket igualmente.
También funciona al revés: si las copias están configuradas en 1 y normalmente siempre se imprime un ticket, una pulsación larga puede omitir la impresión para esa venta.
Verifica el número de caracteres en la configuración de tu impresora en WaiterOne (ver datos -> impresoras -> tu impresora -> ticket -> caracteres de la fuente A y fuente B). Dependiendo de la marca y modelo que estés utilizando, configura el número de caracteres de la fuente B en 56, 57 o 64. 56 es el valor predeterminado, pero las impresoras más nuevas parecen usar más a menudo 64. Para la fuente A, elige 42 o 48 según la impresora que tengas. La Epson TM-T88 usa 42 para la fuente A y 56 para la fuente B. La Epson TM-T20 usa 48 para la fuente A y 64 para la fuente B. El último modelo de Epson m30 usa 48 para la fuente A y 57 para la fuente B.
En la configuración de tu iPad (no en WaiterOne). A la izquierda, al final hay también un menú de WaiterOne. Estos son parámetros que permiten ciertos niveles de acceso al sistema. Por favor, permite el acceso a tu red local.
Verifica la configuración de la pantalla del cliente. Si no tienes una impresora Citizen, no puedes activarla. WaiterOne envía comandos especiales a la impresora y si tu impresora no es de la marca Citizen, probablemente no funcionará correctamente.
La nueva impresora Epson TM-T20IV tiene Secure Printing activado por defecto. Para obtener la mejor compatibilidad con WaiterOne, Secure Printing debe estar desactivado; de lo contrario, la impresión ESC/POS no se puede usar correctamente.
Abre un navegador y ve a la dirección IP de tu impresora. Inicia sesión como administrador. La contraseña de administrador está escrita en la impresora. Después ve a Print > Secure Printing y desactiva Secure Printing.
No hay problema. Puedes usar una impresora matricial de puntos. Hemos realizado pruebas con una Bixolon SRP-275III con interfaz Ethernet, y funciona muy bien.
Algunos clientes han probado con una Epson U-220. Si estás instalando una nueva tarjeta de red en esta impresora, asegúrate de activar el interruptor DIP 2-8. Si no lo haces, la tarjeta de red no será reconocida. Una vez hecho esto, configura la impresora con el software EpsonNet Config en tu PC o Mac.
Para la Star SP700, configura la impresora en modo Epson desactivando el interruptor DIP 1-4 (está en la parte inferior de la impresora).
Ahora tienes que hacer algunas cosas para configurar esta impresora en WaiterOne:
- Ve a los datos -> impresoras -> cocina -> general y selecciona el tipo de impresora ESC/POS.
- Ve a los datos -> impresoras -> cocina -> configuración y establece la fuente de caracteres A en 33 y la fuente de caracteres B en 40 (esto depende, por supuesto, de las especificaciones de tu impresora).
- En los datos -> impresoras -> cocina -> configuración, también activa esta opción: Puede imprimir en rojo.
- Dependiendo de la impresora que tengas, agrega algunas líneas adicionales en la parte inferior de tu impresión; de lo contrario, el corte será demasiado alto. Tuvimos que agregar 2 líneas adicionales. Ve a los datos -> impresoras -> cocina -> pie de ticket y agrega un salto de línea para cada línea que desees. Por ejemplo, <br> es 1 línea, <br><br> son 2 líneas.
¡No hay problema! Tenemos una aplicación KDS (Sistema de Visualización de Cocina). ¡Simplemente usa otro iPad para seguir tus pedidos! No es necesario comprar una impresora y utilizar toneladas de papel térmico costoso. Pero aún así... si prefieres el sonido de una impresora de impacto de puntos, también puedes usarla.
KDS y dispositivos
BREAKING : Pronto nueva versión de WaiterOne.
... pero tendremos que dejar de dar soporte a iOS inferiores a 15.
Así que, por favor, reemplace los siguientes dispositivos: iPad 2, 3 y 4, iPad Air 1, iPad mini 1, 2 y 3 + iPhones hasta 6/6 Plus + iPod Touch hasta la generación 6. Estos dispositivos son de 2014 y ya no podemos soportarlos. Ver también https://iosref.com/ios
Así que si no puede actualizar su dispositivo a iOS 15, deberá reemplazarlo por un dispositivo más reciente.
Fácil, solo asegúrese de que ambos dispositivos estén en la misma red:
- Obtenga la dirección IP de su iPad donde ha instalado el KDS: configuración (de su iPad) -> Wi-Fi: haga clic en la (i) de su red Wi-Fi. Anote su dirección IP
- Inicie KDS
- En su iPad principal donde está instalado WaiterOne, vaya a datos -> impresoras, configure una impresora con la dirección IP de su iPad KDS y elija KDS para el tipo de impresora, pruebe el KDS presionando el botón de prueba de impresora
BREAKING : Pronto nueva versión de WaiterOne.
... pero tendremos que dejar de dar soporte a iOS inferiores a 15.
Así que, por favor, reemplace los siguientes dispositivos: iPad 2, 3 y 4, iPad Air 1, iPad mini 1, 2 y 3 + iPhones hasta 6/6 Plus + iPod Touch hasta la generación 6. Estos dispositivos son de 2014 y ya no podemos soportarlos. Ver también https://iosref.com/ios
Así que si no puede actualizar su dispositivo a iOS 15, deberá reemplazarlo por un dispositivo más reciente.
Cualquier iPad debería servir, incluso el iPad mini 2. Recuerde que Apple a veces es muy duro. Así que tenga en cuenta que ejecutar la última versión de iOS es la mejor guía para invertir en un iPad. Por favor, olvídese de ese iPad 1. Ya no corre el último iOS.
Cualquier iPod a partir de la 5ª generación. Cualquier iPod con iOS 9.3 o superior. El nuevo iPod es genial, así que compre ese (junto con una funda para protegerlo al caer). CONSEJO: contrate camareros que tengan un iPod (o iPhone) 🙂
Hardware y accesorios
Puedes conectar 2 cajones para cada impresora de tickets que uses. Si quieres abrir el cajón de efectivo automáticamente cada vez que imprimes un recibo, simplemente agrega Otra forma de abrir el cajón es activando el interruptor del cajón en la configuración del camarero (Datos -> Camareros -> Funciones especiales -> Cajón). El cajón luego puede activarse o desactivarse según el camarero que haya iniciado sesión. El cajón aquí debe estar conectado como cajón 1 a la 'impresora de facturas'.
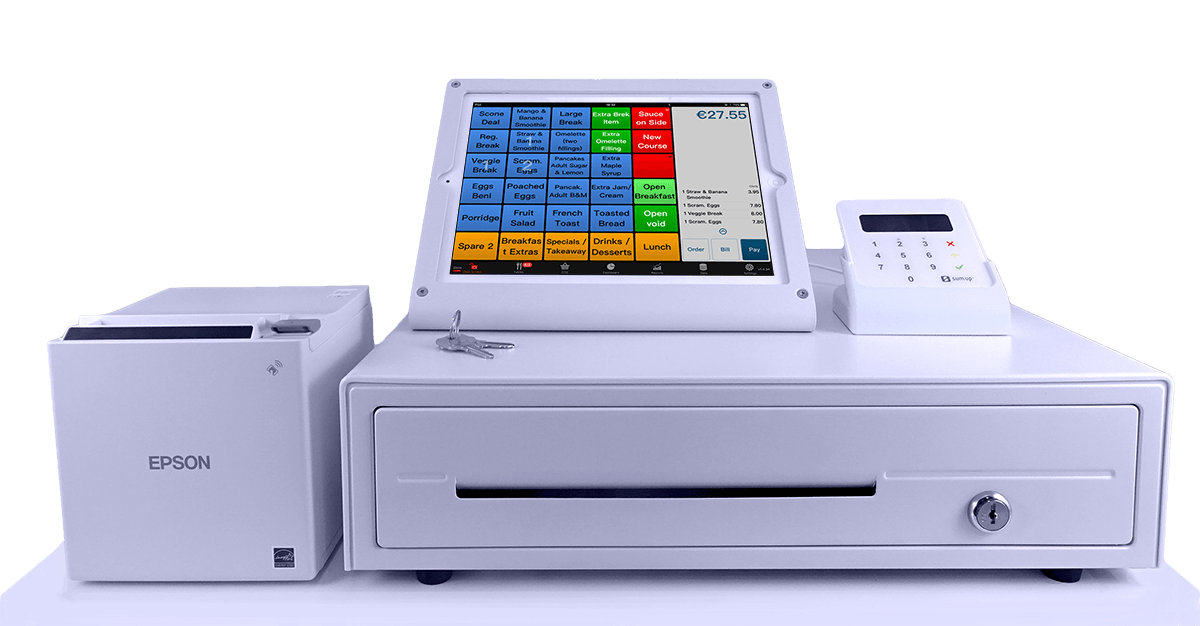
Todos los soportes utilizados en el sitio web de WaiterOne están hechos por Heckler Design. Más información en www.hecklerdesign.com. También puede enviar un correo electrónico a Allan Kiesler para obtener más información y precios, hágale saber que está utilizando WaiterOne. Todos los créditos de las fotos en este sitio web que contienen Heckler Design van a Jill Richards Photography.
Sí, puedes. Desde la versión 1.1.6, hemos integrado un escáner de códigos de barras. Solo trabajamos con los escáneres de la serie 7 de Socket Mobile CHS. Pero estos escáneres son increíbles. Echa un vistazo a su sitio web: www.socketmobile.com.
Escáneres manuales inalámbricos serie 7 de Socket Mobile (CHS). Tienen un par de modelos y hasta los tienen en bonitos colores llamativos. Compra una versión 1D, no compres una versión 2D (para leer códigos QR), ya que no se usa en WaiterOne y es más cara: CHS 7Ci, CHS 7Di (= duradero), CHS 7DiRx (= duradero y antimicrobiano), CHS 7Mi (= escaneo de largo alcance y condiciones de iluminación sensibles), CHS 7Pi (= igual que 7Mi + duradero). En resumen: quédate con el 7Ci o 7Di. Si optas por un 7Ci, elige un color (rojo, amarillo, azul...). Más información en su sitio web: www.socketmobile.com.
Primero configura tu escáner para que funcione en modo iOS. No funcionará correctamente en ningún otro modo. Normalmente deberías haber recibido una hoja de configuración con tu escáner. Escanea el código de modo iOS. También hay una hoja de configuración en el sitio web de Socket Mobile. Pagina 3 tiene el código de modo iOS. También podrías configurar tu escáner para que emita un pitido o vibre cuando hayas realizado un buen escaneo.
En segundo lugar, empareja tu escáner con tu iPad. Es un escáner bluetooth, así que debes habilitar el bluetooth en tu iPad: Configuración -> Bluetooth
En tercer lugar, activa tu escáner en WaiterOne: Configuración -> Código de barras
Sí. La antigua integración con botones NIU ya no es compatible. Ha sido reemplazada por los códigos QR de WaiterOne, que son más fáciles de implementar y no requieren hardware adicional.
Con los códigos QR, los clientes pueden usar su propio teléfono dentro del flujo de servicio, por ejemplo para llamar al camarero, pedir la cuenta o usar las funciones de pedido de clientes compatibles.
¡No, no vendemos hardware! Pero conocemos lugares donde puedes encontrarlos. Por favor, compare precios ya que pueden variar mucho.
Socios preferidos:
... (Ver versión en inglés para enlaces)
Puede utilizar la función ‚carta de menú‘ como un servicio adicional para sus clientes. Todos los que tengan un iPhone, iPod o teléfono inteligente tendrán acceso a ella. Es divertido y muy moderno para ellos (y para usted). Los cambios de precio y los problemas de ‚agotado‘ se actualizan inmediatamente. ¿Quizás podría experimentar con esta función utilizando un iPad adicional como ‚carta de vinos‘? Seguro que su negocio será ‚la comidilla de la ciudad‘. La ‚carta de menú‘ se está replanteando seriamente, eche un vistazo a nuestro COS.
Pagos e impuestos
Claro que puedes ...
Primero ve a métodos de pago en los datos (abajo).
Crea un nuevo botón y llámalo 10% de descuento.
Dale un bonito color que no sea efectivo, tarjeta o tarjeta de crédito como en la foto de abajo y dale los valores como se configuran en la otra foto!
Una vez configurado, espera un momento, ve a las mesas, cierra WaiterOne y reinícialo. No olvides volver a descargar tus mandos a distancia si los usas.
La próxima vez que quieras usar el 10%, ve a pagar, presiona el botón 10% y luego elige el método de pago (efectivo, tarjeta o tarjeta de crédito)
Buena suerte y disfruta usándolo. No dudes en promocionarnos con tus colegas.
También hay un segundo método:
Crea un botón de precio abierto y escribe 10% +/- ENTER después de tocar este botón.
Y un tercer método:
Crea diversos precios por botón. WaiterOne actualmente puede manejar 3 precios por producto. Para saltar a otro nivel de precio presiona el número en las teclas especiales (donde están casa y retorno). La tecla con los niveles de precio salta de 1 a 2, a 3 y luego vuelve a 1. También hay una visualización en la pantalla principal que se ilumina si estás trabajando en el nivel de precio 2 o 3.
- Creación de diferentes métodos de pago en Datos -> Pagos:
Para configurar varios métodos de pago, ve a Datos -> Pagos. Cada método de pago debe tener un valor asociado, que represente su conversión a tu moneda local. Por ejemplo, usa '1' para efectivo y '0,92' para dólares si operas en euros. Si tienes vales de pago personalizados, puedes agregar su valor respectivo en el campo de valor. Si deseas crear un botón de propina, configura el valor en '1' y activa el botón de servicio. - Activación del cobro y elección de un método de pago predeterminado en Configuración -> General -> Factura:
Para habilitar el cobro y especificar un método de pago predeterminado, accede a Configuración -> General -> Cobro. La activación del cobro agiliza el proceso de cierre de mesa al permitirte seleccionar un método de pago. Cuando no elijas un método de pago durante el cierre de la mesa, se aplicará el método de pago predeterminado. Además, se utiliza el método de pago predeterminado para emitir reembolsos a los clientes, como cuando un cliente paga con tarjeta y recibe efectivo de vuelta. Por favor, evita establecer tarjeta o propina como el método de pago predeterminado.
Para gestionar menús en WaiterOne para diferentes platos de comida (como aperitivos o platos principales), sigue estos pasos:
4 cosas que debes hacer para configurar SumUp en WaiterOne:
Necesitas la versión 1.7 o superior de WaiterOne.
3 cosas que se deben hacer para configurar Zettle en WaiterOne:
Necesitas la versión 1.6 o superior de WaiterOne.
Hay 2 cosas que debes hacer para configurar Payconiq en WaiterOne :
Se imprimirá un código QR con cada factura, puedes escanearlo con la aplicación Payconiq, al pagar la mesa se debitará automáticamente en WaiterOne.
Sí, WaiterOne es independiente de la moneda. £, $, €, TL o CHF, ¡lo que sea!
Sí, sabemos que las regulaciones de IVA/impuestos pueden ser bastante complicadas en algunos países. Por favor, envíenos un correo electrónico si tiene un problema específico relacionado con este asunto. Por ahora, así es como se configura WaiterOne para trabajar con una tasa de IVA/impuesto diferente para artículos vendidos para llevar:
- Cree las diferentes tasas de IVA/impuestos en datos -> IVA/impuestos, por ejemplo, 6%, 12% y 21%
- Seleccione para cada grupo y producto el IVA/impuesto para ventas normales (IVA/impuesto 1) y para llevar (IVA/impuesto 2). En algunos países, las bebidas con alcohol tienen siempre la misma tasa de IVA/impuesto, mientras que la comida tiene una tasa de IVA/impuesto más baja cuando se vende para llevar.
- Cree una mesa para llevar y seleccione el IVA/impuesto 2 como nivel. En situaciones normales, siempre tendrá el IVA/impuesto 1 como nivel.
Servicios y avanzado
Estamos agregando nuevos idiomas en cada actualización. WaiterOne ya está traducido a 18 idiomas: Chino, Danés, Holandés, Inglés, Francés, Alemán, Griego, Italiano, Japonés, Noruego, Polaco, Portugués, Sueco, Ruso, Serbio, Español, Tailandés y Turco. ¿Quieres ayudar o encontraste una mala traducción? ¡Avísanos!
¡Envíanos tu menú o diseño del restaurante, lo haremos por ti a un precio razonable! En realidad, no lo hacemos nosotros, pero conocemos a personas que pueden hacerlo.
Asegúrate de guardar correctamente tu archivo csv antes de importarlo a WaiterOne.
En Google Sheets como valores separados por comas (.csv):
En Microsoft Excel como archivo CSV de Windows (.csv):
Si piensas que puedes vender y dar soporte a WaiterOne, pero quieres usarlo bajo tu propio nombre. Envíanos un correo electrónico. ¿Tienes ideas para otra forma de trabajar juntos?
Nunca digas nunca. ¡Pero simplemente no hay necesidad de hacerlo! ¿Verdad? El ecosistema de Apple, iOS, el iPad y el iPhone son simplemente perfectos. Así que no tenemos intención de reescribir el código para Android. No olvides que WaiterOne está escrito en código nativo, rápido y eficiente en Objective-C. Ejecutarlo en Android no sería posible o tendríamos que reescribirlo y mantenerlo simultáneamente.
Entonces, ¿por qué otros tienen soluciones que funcionan en cualquier dispositivo (en iPad, Android, Mac, PC, …)? Fácil, no son nativas, utilizan tecnología de sitios web (html 5/jQuery/…) para crear una solución (lenta e inconfiable) para ejecutarlo en cualquier navegador en cualquier dispositivo, a veces incluso ocultan el navegador para que pienses que es nativo (te venden una aplicación que abre un sitio web en una caja). Pero en realidad es un sitio web con tus productos y ventas, funcionando en un centro de datos en algún lugar del mundo.