Category: Setup

  • Belgium FDM Activation Guide

    This guide explains how to activate and configure the Belgian Fiscal Data Module (FDM) in

    the WaiterOne POS system. The FDM integration is used for staff time registration and fiscal POS

    operations.

    1. Configure Staff Social Security Numbers

    Each POS operator must have their Belgian Social Security Number (SSN) configured.

    Steps:

    • Open the POS menu.
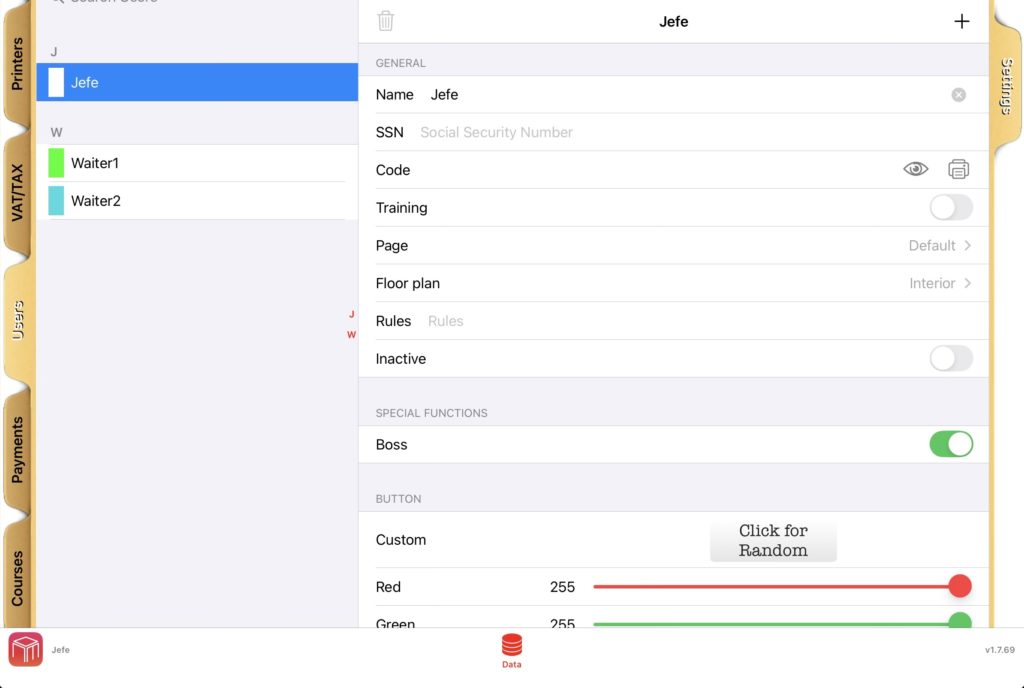
    • Navigate to: Menu → Data → Users.
    • Select each user that will operate the POS.
    • Fill in the SSN field with the employee’s official Belgian Social Security Number.

    Important: The SSN must contain 11 digits and correspond to the official number of the

    employee. This value is required for Work-In and Work-Out fiscal events.
    2. Configure Payment Methods

    Each payment method used in the POS must be correctly mapped for fiscal reporting.

    Steps:

    • Open the POS menu.
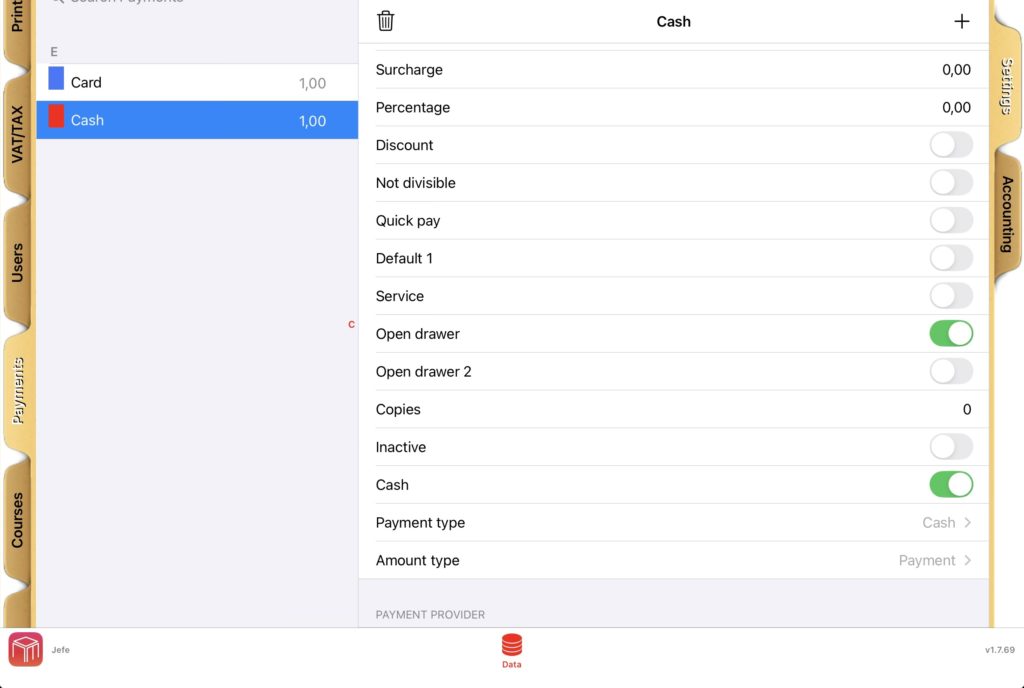
    • Navigate to: Menu → Data → Payments.
    • For each payment method configured in the system, select the appropriate Payment Type and Amount Type.

    Typical configuration examples:

    Payment Method Payment Type Amount Type
    Cash CASH PAYMENT
    Card CARD PAYMENT
    Tip in cash CASH TIP
    Voucher VOUCHER PAYMENT

    Important: Every payment method used in the POS must have these fields correctly

    configured.
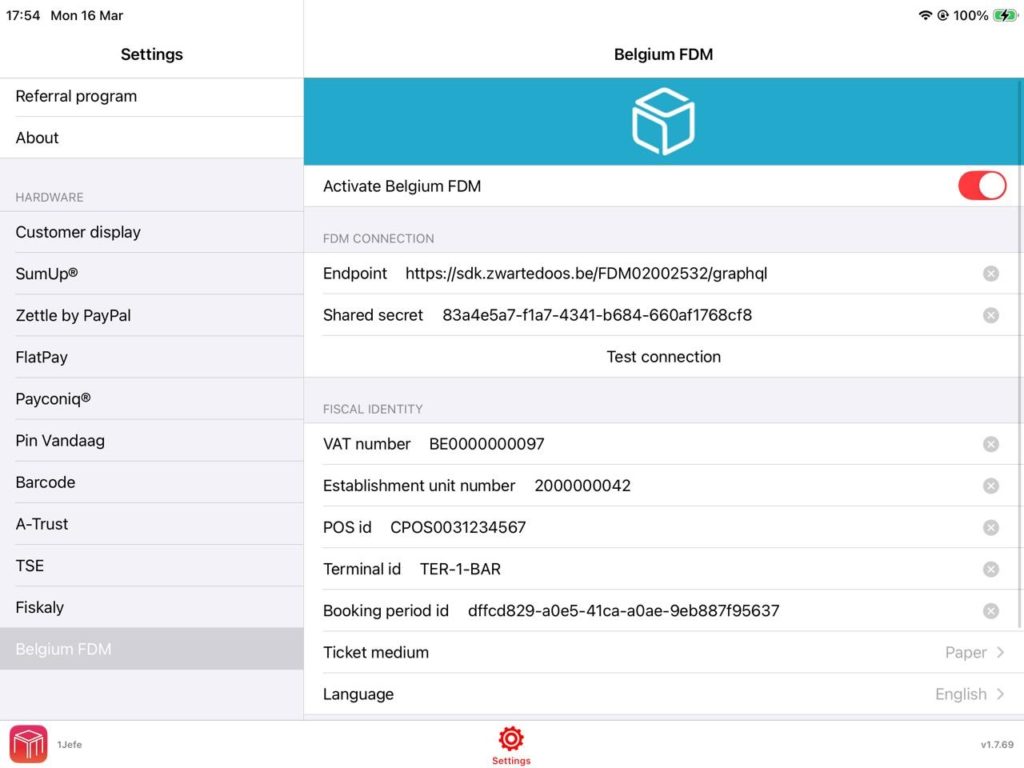
    3. Configure Belgium FDM Settings

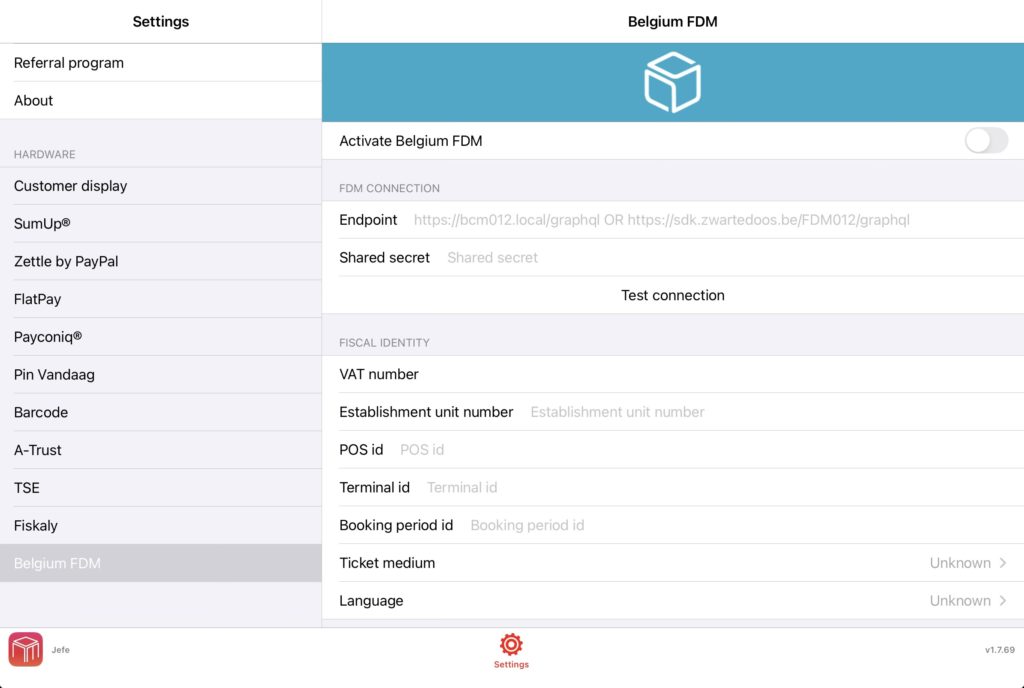
    The FDM connection parameters must be configured in the POS.

    Steps:

    • Open the POS menu.
    • Navigate to: Menu → Settings → Belgium FDM.
    • Fill in all required configuration fields.
    4. System Behaviour After Activation

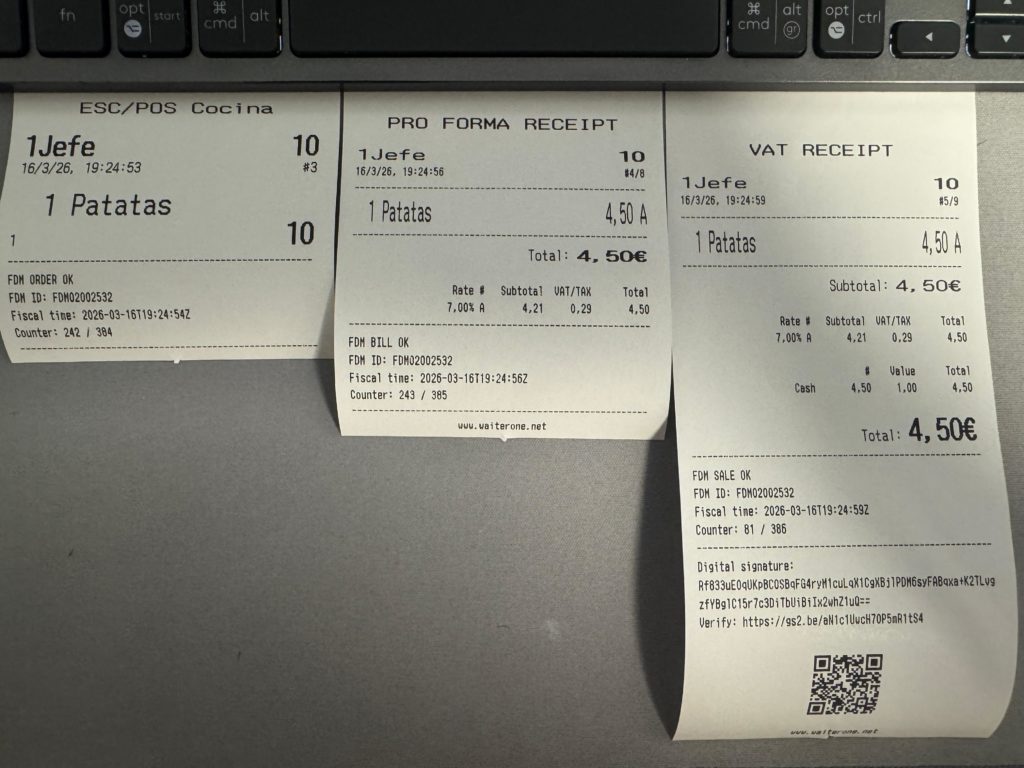
    Once all parameters are configured, the POS will automatically send fiscal events to the FDM

    system.

    • Staff Time Registration:

      Work-In events when a user starts working.
      Work-Out events when a user finishes working.
    • Fiscal POS Events:

      Orders, Bills, Payments.

    5. Important Notes

    • Each operator must have a valid SSN configured.
    • Each payment method must have a valid fiscal mapping.
    • The Belgium FDM settings must be fully configured.

    6. Troubleshooting

    • Verify that all users have a valid SSN configured.
    • Check that all payment methods have Payment Type and Amount Type defined.
    • Ensure the Belgium FDM configuration fields are correctly filled.
    • Confirm that the POS has an active internet connection.

    7. Support

    If you experience issues during activation, please contact your POS provider, technical support or WaiterOne support. When requesting support, provide the POS identifier, terminal identifier, and screenshots of the configuration.
  • How to Transfer WaiterOne to a New iPad

    Moving WaiterOne from one iPad to another is simple. Follow the steps below to transfer your database and continue working on your new device.

    1. Install WaiterOne on the new iPad

    First, download and install WaiterOne on your new iPad.

    2. Create a backup on the old iPad

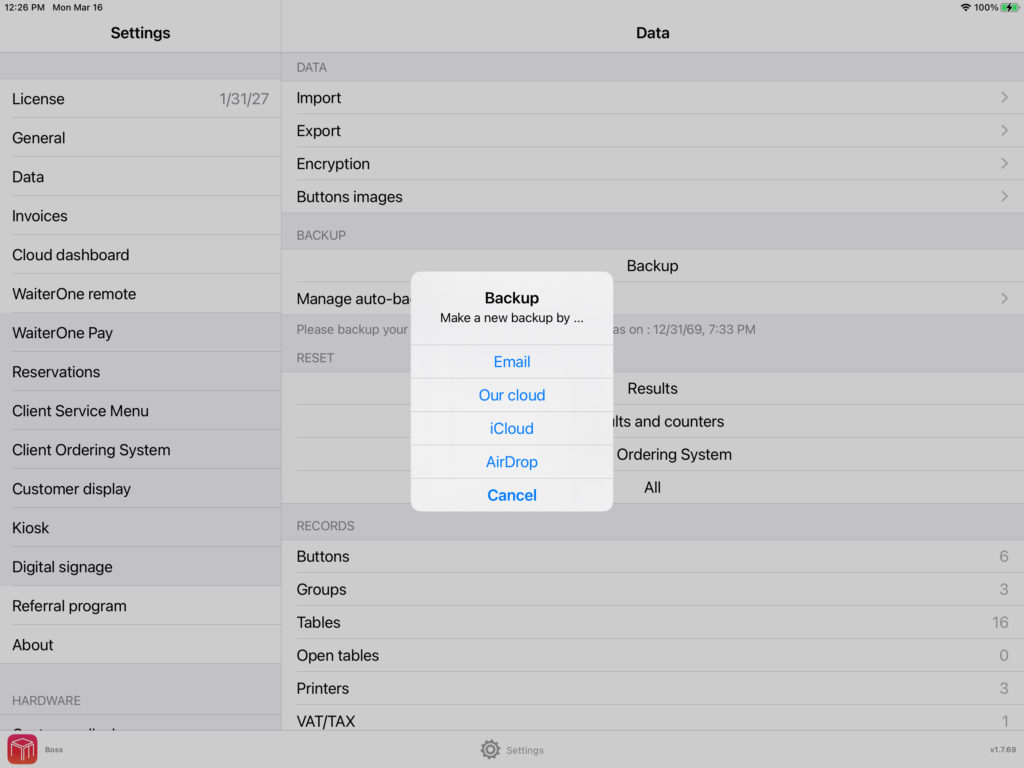
    On your old iPad, open WaiterOne and go to:

    Settings → Data → Backup

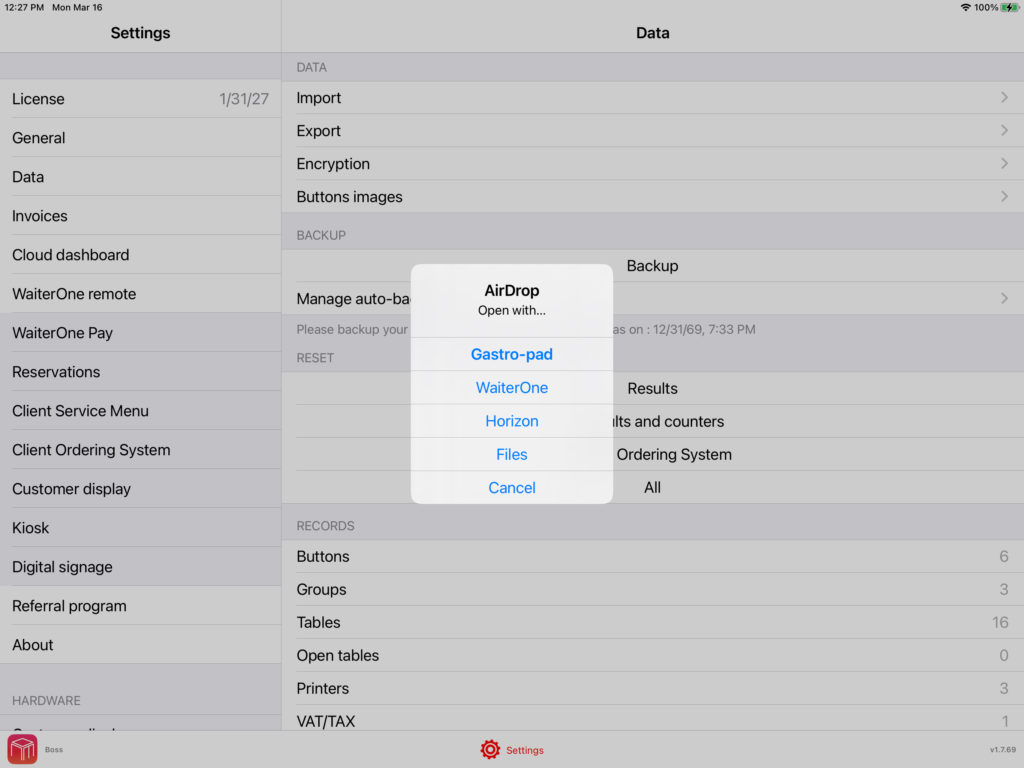
    Create a backup and choose how you want to send it:

    • Email
    • AirDrop

    Then send the backup file to your new iPad.

    3. Open the backup on the new iPad

    On the new iPad, receive the backup file and open it in WaiterOne.

    Depending on how you sent it:

    • If you used AirDrop, you can usually open it directly.
    • If you received it by email or saved it in Files, tap and hold the backup file for a moment, then choose Open in WaiterOne or Share to WaiterOne.

    4. Replace the database

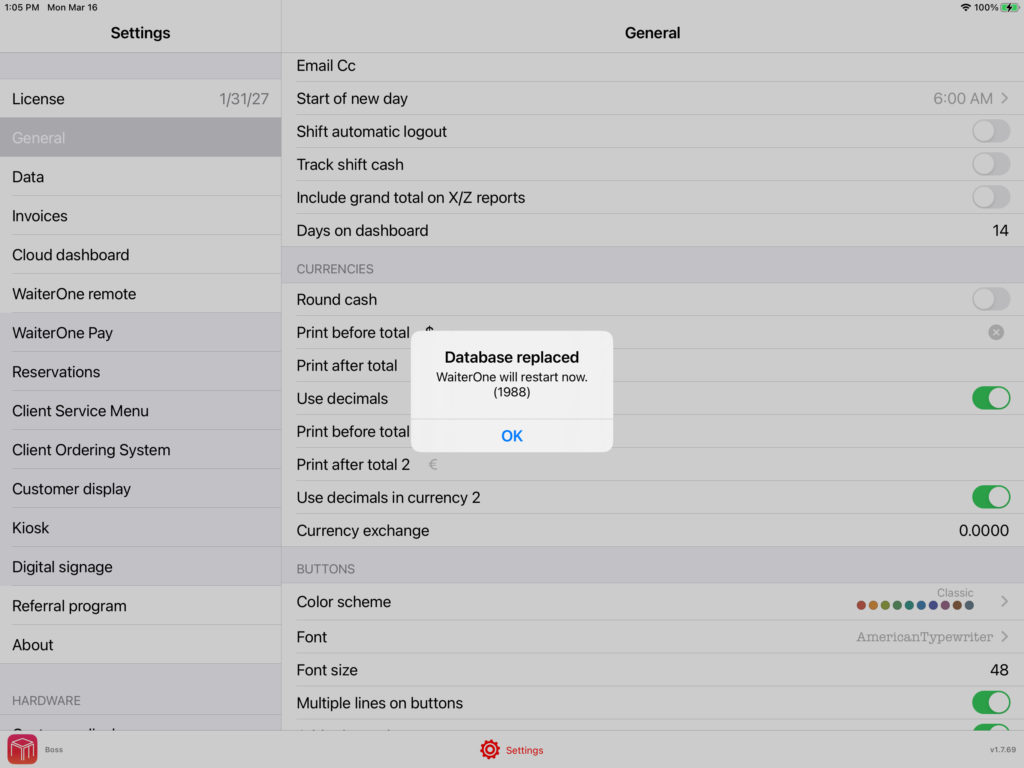
    WaiterOne will ask if you want to replace the current database.

    Confirm this step.

    At that moment, the administrator code should be displayed.

    5. Change your online dashboard password

    After the import, start WaiterOne on your new iPad and go to:

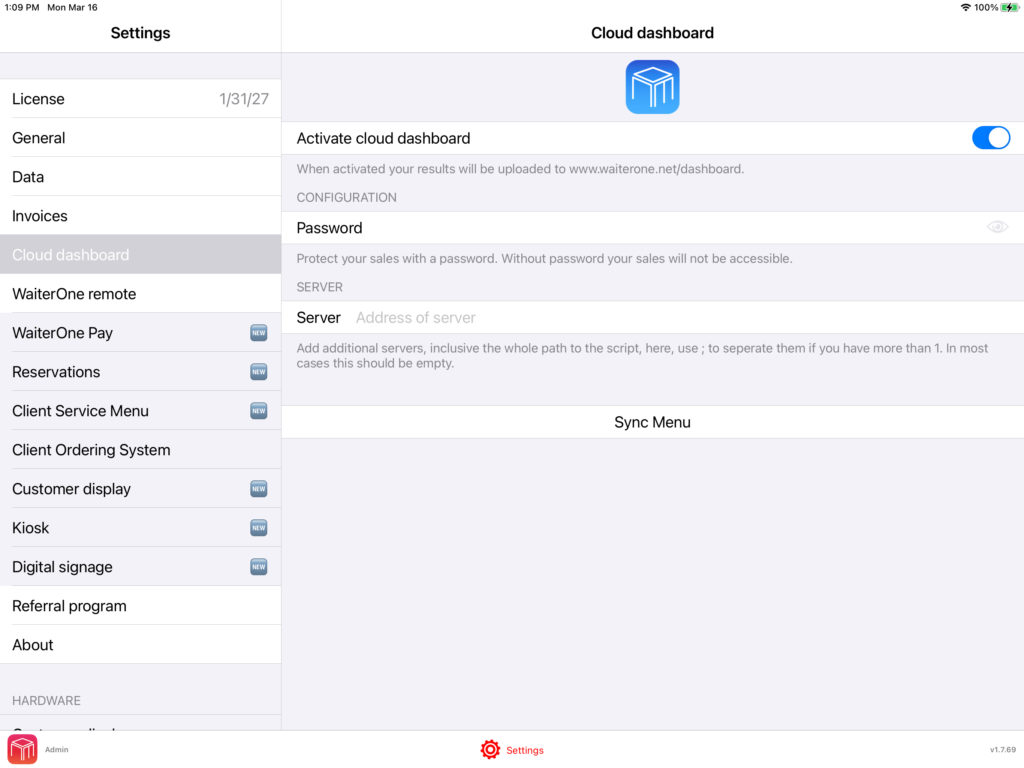
    Settings → Online Dashboard

    Please change your password there.

    This is important because the password is automatically changed after the import. We do this for security reasons, so nobody can know your password if they ever get access to your database.

    6. Contact us to transfer your license

    Once the transfer is complete, contact us so we can move your WaiterOne license to the new iPad.

    If you would also like your historical sales data to be transferred, please let us know as well, since this must be transferred separately.

  • No Internet? No Problem. WaiterOne Keeps Your Business Running

    No Internet? No Problem. WaiterOne Keeps Your Business Running

    When technology fails, your business shouldn’t have to. At the end of April 2025, parts of Spain experienced a widespread electricity and internet outage, leaving many restaurants and cafés scrambling to keep operations going. But for WaiterOne POS users, it was business as usual.

    Local System, Global Advantage

    Unlike cloud-based systems that depend on constant internet connectivity, WaiterOne runs locally on your Mac or PC. This means that even when the internet goes down, your POS continues to function flawlessly. Orders, payments, and receipts can all be handled without disruption.

    In a world where digital reliability is increasingly important, local-first architecture is a game-changer.

    Power Out? Your iPad Keeps Working

    During the April outage, several clients in Spain reported that their WaiterOne systems kept running smoothly. Even when electricity was cut, they continued to take orders using their iPads, which remained powered thanks to built-in batteries. This allowed them to:

    • Keep serving customers without delays
    • Print orders locally to kitchen and bar printers (still active on backup power or battery packs)
    • Avoid losing sales or frustrating guests
    • Stay operational while competitors relying on cloud POS systems were down

    No Downtime, No Lost Revenue

    WaiterOne is built with practical resilience in mind. By working over a local Wi-Fi network, it ensures that service continues even in adverse conditions. Whether it’s an internet outage, a router glitch, or a temporary power loss, your restaurant doesn’t stop and neither does your revenue.

    Why It Matters

    For restaurants, cafés, food trucks, and bars, every minute of downtime is a lost opportunity. With WaiterOne:

    • You’re not dependent on a server in the cloud
    • You’re in full control of your operations
    • You can keep taking orders, print tickets, and serve customers even when the lights go out

    Real Proof from Real Businesses

    The recent events in Spain are a clear example: while others paused, WaiterOne clients kept working. That’s the reliability every hospitality business needs in unpredictable times.


    Ready to Run Without the Internet?

  • How to Install and Set Up WaiterOne Remote

    If you want to take orders faster and more efficiently, using the WaiterOne Remote app on an extra iPad or iPhone is the perfect solution. Setting it up is quick, but there are a few important settings you need to adjust to make sure everything works smoothly.
    Follow the steps below to connect your Remote device to your main WaiterOne system.

    On the Main iPad (Running WaiterOne)

    1. Activate WaiterOne Remote
      Open the Settings inside the WaiterOne app and enable WaiterOne Remote.
    2. Allow Location Access
      Go to the iPad’s main Settings app. Scroll down to WaiterOne (either directly in the list or under Apps > WaiterOne) and set Location Access to Always.
      Tip: Without this setting, your Remote devices might not find the main iPad.
    3. Enable Local Network Access
      Still in the iPad’s Settings, enable Local Network access for WaiterOne.
      This allows your main device to communicate with Remotes over the same Wi-Fi network.

    On the Remote iPad or iPhone

    1. Enable Local Network Access
      On your Remote device (iPad or iPhone), open the Settings. Scroll down to Remote (or Apps > Remote) and enable Local Network access.
    2. Connect to the Server
      Open the WaiterOne Remote app and go to Settings → Server.
      • Normally, the host (your main iPad running WaiterOne) should appear automatically.
      • If it doesn’t, there may be a network issue. You can manually enter the IP address instead:
        • On your main iPad, go to Settings → Wi-Fi.
        • Tap the connected network name and find your device’s IP address.
    3. Download the Configuration
      After selecting or entering the server, simply press Download.
      The Remote app will import the necessary settings and link to the main WaiterOne system.
    WaiterOne Remote on iPhone

    Final Tips

    • Make sure both devices are connected to the same Wi-Fi network. Once configured your remote will also work without being connected to the same Wi-Fi network.
    • Double-check that Local Network and Location permissions are allowed, or the Remote won’t be able to find the server.
    • If you experience connection issues, restarting both devices and your Wi-Fi router often helps.

    By following these steps, you’ll have your WaiterOne Remote up and running in just a few minutes, ready to take orders and speed up your service!


    Quick Setup Checklist ✅

    On the Main iPad:

    •  Open WaiterOne → Settings → Activate WaiterOne Remote.
    •  Go to iPad Settings → WaiterOne → Set Location Access to Always.
    •  Enable Local Network access for WaiterOne.

    On the Remote iPad/iPhone:

    •  Enable Local Network access for Remote (in iPad/iPhone Settings).
    •  Open WaiterOne Remote → Settings → Server.
    •  Select the server automatically, or manually enter the main iPad’s IP address.
    •  Tap Download to sync settings.

  • Streamline Order Management with Colour-Coded Users

    With WaiterOne POS, managing your restaurant’s workflow becomes both intuitive and efficient. The system allows you to assign specific colours to users who are taking or entering orders, making it easy to quickly identify and prioritise tasks at a glance.

    User Rights and Table Plan Visibility

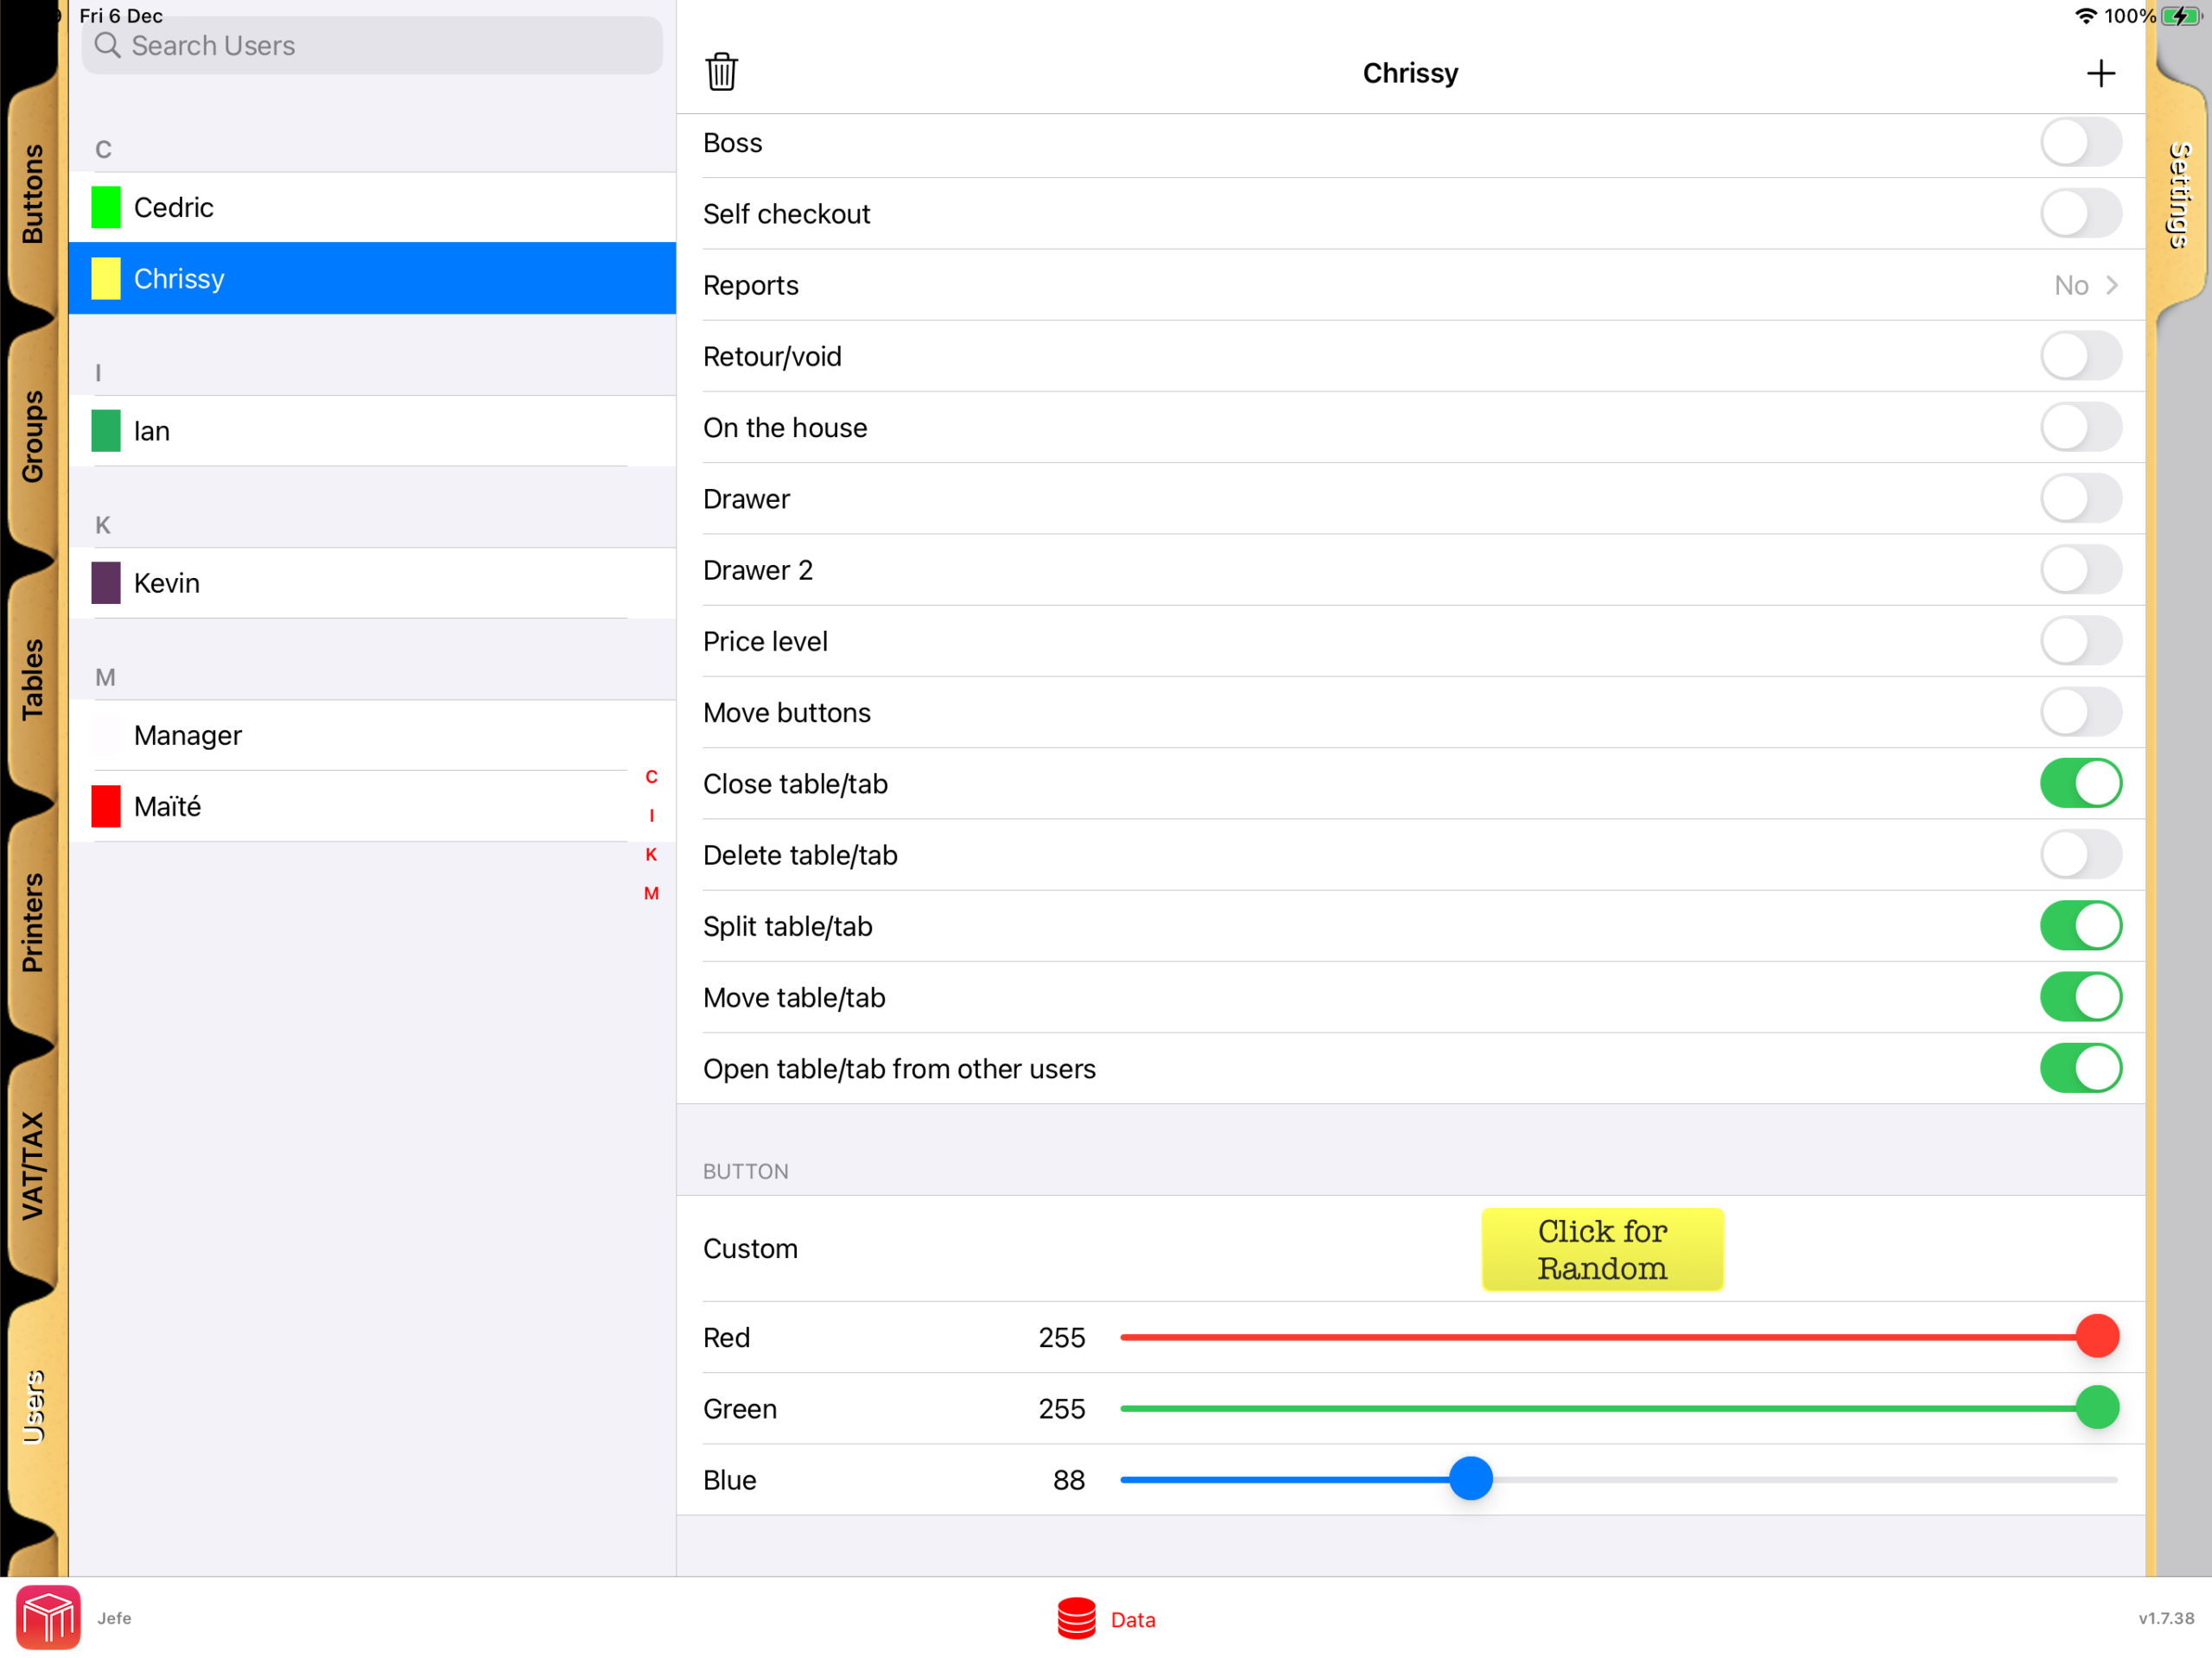
    User rights in WaiterOne.

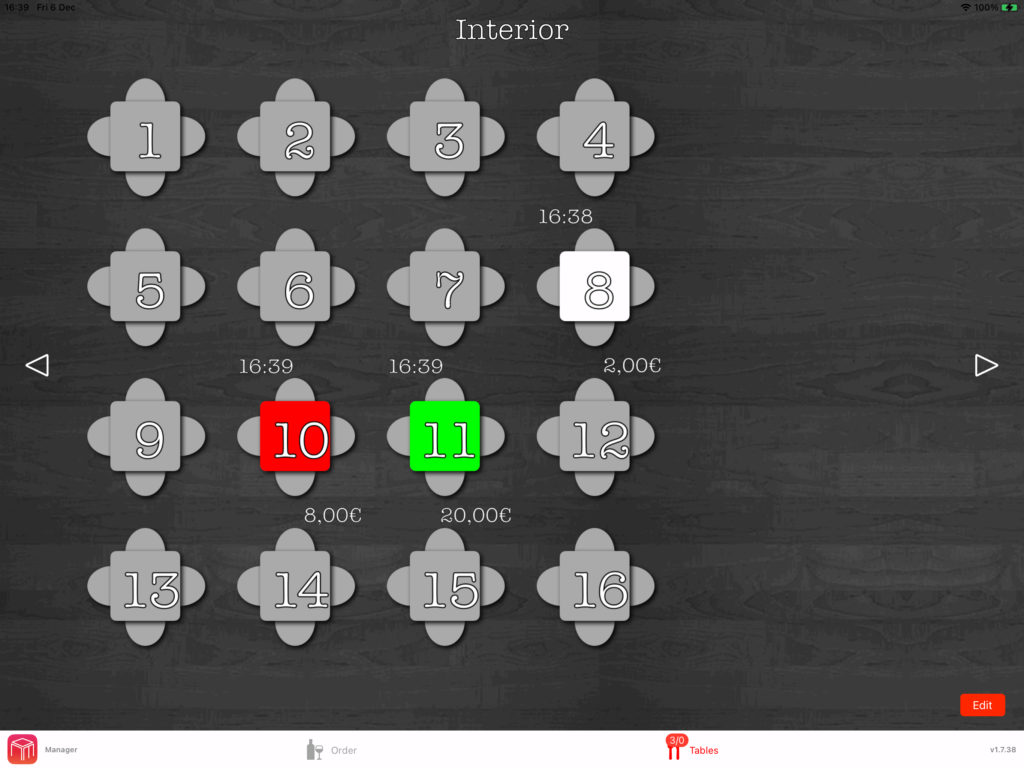
    In WaiterOne, each table on the floor plan is color-coded to match the user assigned to it. This visual cue lets you instantly see which server is responsible for each table.

    Table plan with tables in the colour of the user.

    Personalised KDS Settings

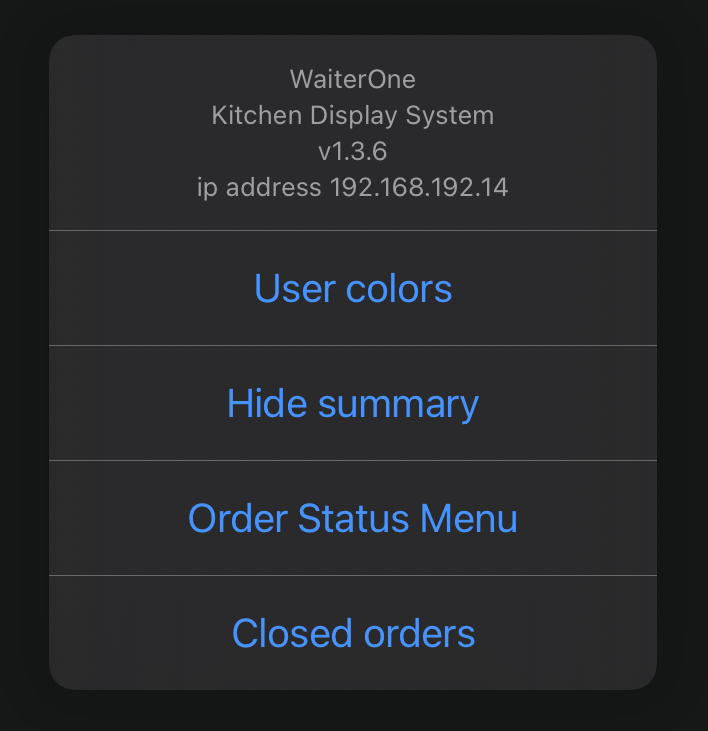
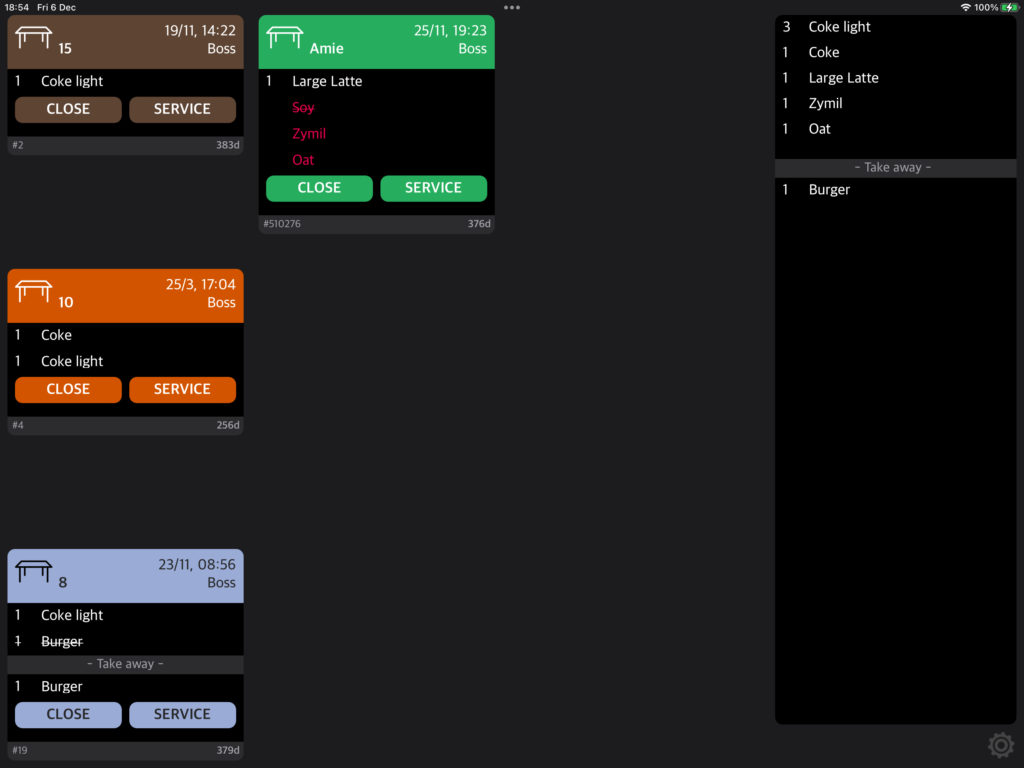
    On the Kitchen Display System (KDS), you can choose to display orders using the designated user colors or assign unique colors to each order. This customisation option ensures you can tailor the system to your workflow.

    Enhanced Communication Across Teams

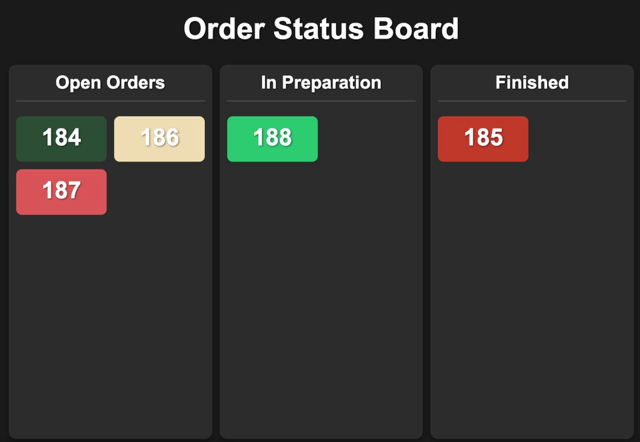
    The colour-coding system ensures seamless communication between front-of-house and back-of-house staff. When a user is assigned a specific color, it appears consistently across the status board and KDS, allowing everyone to stay aligned on order progress.

    Order status board with open, in preparation and finished orders.

    Better Organisation, Fewer Errors

    This integration enhances organisation and reduces the risk of errors, enabling your team to respond faster to customer needs. As a result, WaiterOne ensures a more streamlined dining experience, boosting customer satisfaction and improving operational efficiency.