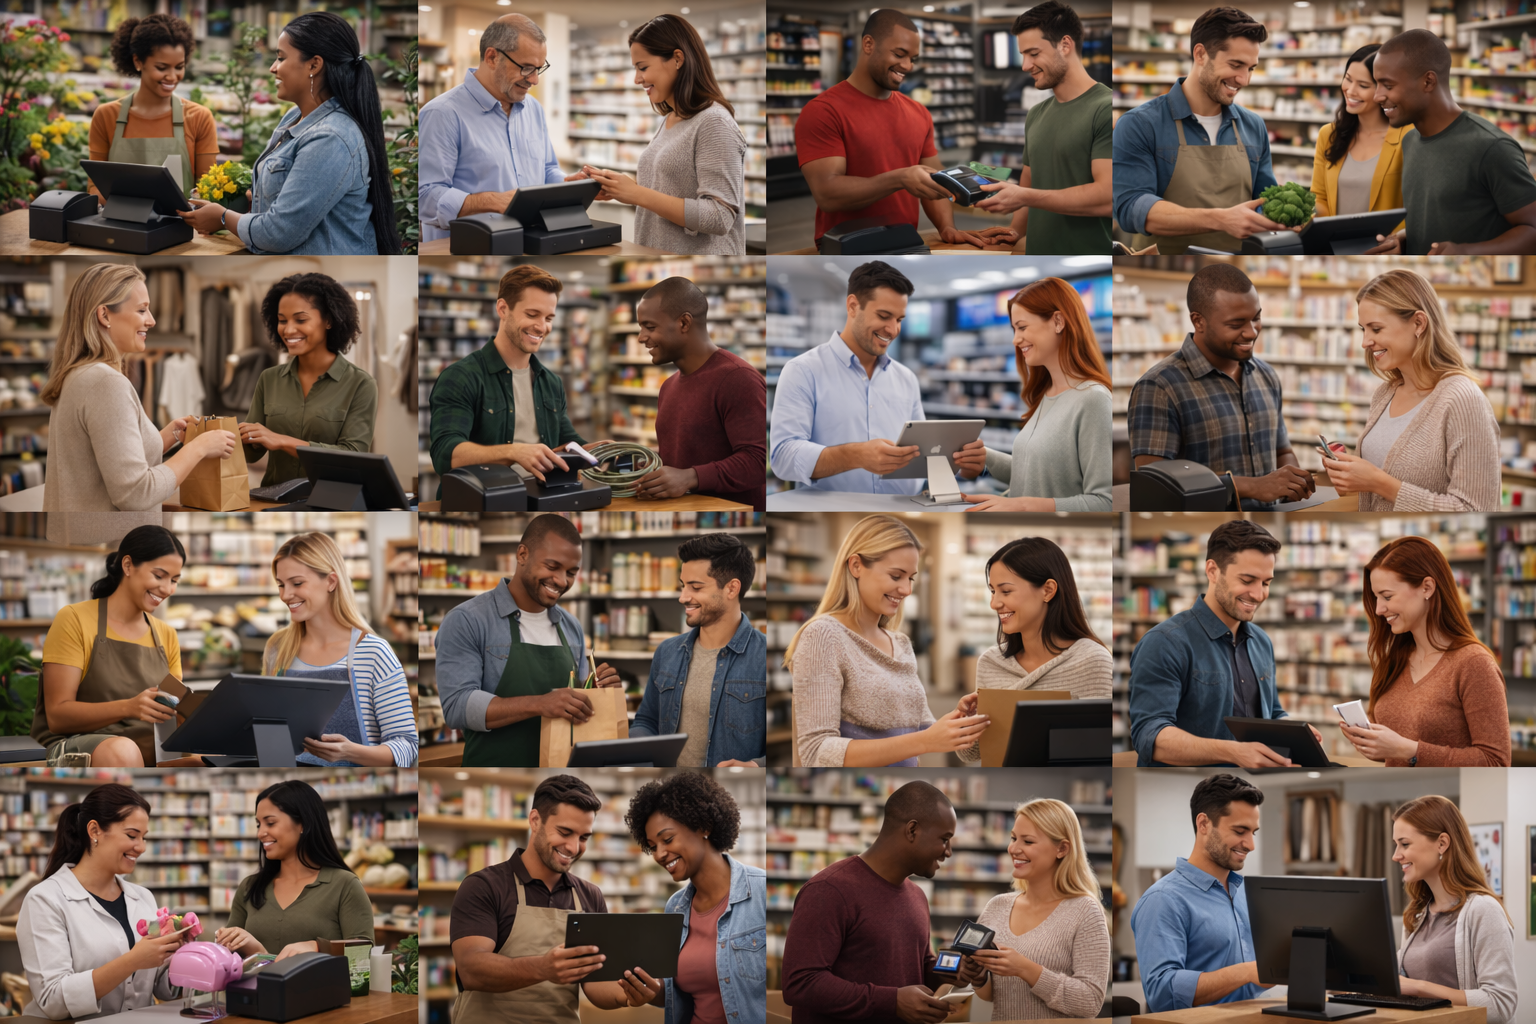
Example of a café POS with a customer-facing tablet display showing order details and a QR code.
Modern restaurants, bars, and food trucks are adopting customer-facing displays to streamline service and engage guests. These screens (often tablets or embedded browser displays in fullscreen mode) show order details, payment prompts, and even idle slideshows with welcome messages. To truly optimize the customer experience, however, businesses can extend these displays with additional features and best practices. Below is a comprehensive guide to features that work well in real-world implementations, structured by category for clarity.
Real-Time Order Status and Queue Updates
Keeping guests informed about their order’s progress can greatly enhance transparency and reduce anxiety. Consider adding an order status tracker on the display:
- Live Order Progress: Show real-time updates like “Order #123 – Being Prepared” and notify when it’s “Ready for Pickup.” This keeps customers in the loop from preparation to completion . Digital “order ready boards” in many quick-service restaurants display each order’s status so customers know exactly when to approach the counter . This transparency assures guests their order is on track and reduces the need to ask staff for updates .
- Queue Position or Numbers: If applicable, display a queue number or place in line. For example, order queue screens list active orders by number or name, moving them to a “Ready” section when done. This is common in fast-casual spots and food trucks, where seeing your number advance provides peace of mind. It prevents customers from wandering or crowding the pickup area .
- Multi-Channel Orders: If your business takes orders from multiple channels (kiosk, mobile app, third-party delivery), consolidate them on one board. Advanced systems can highlight or label orders by source (e.g. online, in-store) so every guest sees their order status regardless of how they ordered . This unified approach ensures no one is left wondering about their order.
- Estimated Wait Times: While not always exact, giving a rough prep time or a progress bar can set expectations. Even a simple message like “~5 minutes remaining” can reassure patrons.
- Audible Alerts: In loud environments, consider an audible cue or chime when an order is ready. In multi-language settings, some order status systems even announce ready orders in more than one language for inclusivity (e.g. speaking the order number in English and Spanish).
By implementing real-time status updates, you minimize perceived waiting and free up staff from fielding “Is my order ready?” questions. Keeping customers informed and engaged with their order progress leads to a smoother, more interactive experience and ultimately higher satisfaction.
Dynamic Promotions and Upselling Content
A customer-facing display isn’t just for information – it’s prime advertising real estate at the point of sale. Leverage it to increase sales through timely promotions and upsells:
- Promotional Banners: Showcase specials, combos, or time-of-day offers on the idle screen or a portion of the checkout screen. For instance, display a “Happy Hour 2-for-1 Drinks” banner in the late afternoon, or a breakfast sandwich deal in the morning. Customers’ eyes are naturally drawn to the screen while waiting, so an appealing deal can entice impulse buys. In fact, about 7 in 10 customers have purchased an item because a sign caught their eye, so well-placed visuals at checkout are highly influential .
- Suggestive Upsells: Use the display to suggest add-ons related to the current order. For example, if a guest is buying a dessert, the screen might politely recommend “Try a coffee for 50% off with your cake!” This contextual upsell approach can be very effective . One case described a customer who bought a meal and, while watching the status screen, saw an offer for a half-price beverage – a smart way to increase the check size by targeting what complements their purchase . Visual prompts for upgrades (add cheese? larger size?) or cross-sells (sides, drinks, desserts) at the moment of decision can raise average spend .
- Discount and Deal Indicators: If your system supports it, show how much the customer is saving with current promotions or how close they are to qualifying for one. For example, “Spend $2 more to get a 10% discount!” This can nudge customers to add that extra item. One retail POS example shows the screen informing customers if they’ve met a minimum purchase for a deal – encouraging them to add a small item if not .
- Advertisements and Slideshows: During idle mode, run a slideshow of high-quality food photos, upcoming events, or loyalty program ads. Ensure ads don’t obstruct transaction details during checkout – they can rotate in a corner or alternate with the order summary. The key is to engage customers visually so their wait time feels shorter while also marketing your offerings. Bright images or even short looping videos (muted, with captions) of menu highlights can whet appetites and drive additional orders.
- Time-of-Day Content Scheduling: Update promotions based on the time or day of week. Breakfast vs. dinner menus, seasonal specials, or limited-time offers can automatically display at relevant hours. This keeps content fresh and relevant, increasing the chance customers notice and act on it.
By turning the screen into a mini digital signage, you not only increase potential revenue through upselling but also enhance the customer experience – guests appreciate knowing about deals and new items. Upselling at the POS is so effective that it consistently leads to larger check sizes and revenue boosts when done tastefully .
Multi-Language Support and Localization
Hospitality is a diverse industry, and your customers may speak different languages. A customer-facing display should accommodate this diversity to be truly user-friendly:
- Language Selection: If the display is interactive or part of a self-service kiosk mode, allow users to choose their preferred language at the start. Many modern self-order kiosks feature a simple language menu (flags or language names) so guests can navigate in their native tongue . This immediately breaks down a barrier and makes the ordering or payment process more comfortable.
- Bilingual Messaging: Even if the screen is mostly passive (non-interactive), consider showing key messages in a second language, based on common needs of your locale. For example, in a tourist-heavy area, an idle welcome screen might say “Welcome – Bienvenidos” or display instructions in both English and Spanish. Important prompts (like “Confirm Order” or “Enter PIN”) could be shown sequentially in two languages if space permits.
- Localize Content and Currencies: Ensure the display can handle local conventions – e.g., switching currency symbols, date/time formats, or using appropriate color symbolism for that culture if relevant. For instance, a food truck in a bilingual city might program the system to default to the customer’s language based on a card swipe or loyalty profile, if known.
- Multi-Language Order Announcements: In contexts where orders are announced or displayed for pickup, a multi-language capability can shine. Some order status boards will enunciate order numbers or flash “Ready” messages in multiple languages , making sure all customers understand that their food is ready. This is especially helpful in international food courts or airports.
- Culturally Appropriate Imagery: As part of localization, use images or icons that are universally understood (or specifically tailored to the cultures you serve). Avoid language-specific text in images unless you provide translations.
Multi-language support is crucial in diverse markets – it increases accessibility and comfort for non-native speakers . In real-world terms, a guest who might struggle to order or pay in the default language will greatly appreciate and remember that your display “spoke their language.” This inclusivity can set you apart in customer experience.
Accessibility and Inclusive Design
To truly delight all guests, customer-facing displays must be usable by people of all abilities. Adhering to accessibility best practices not only broadens your customer base but may also be required by regulations. Key improvements include:
- Large, Legible Text: Use sufficiently large font sizes for item names, prices, and instructions. A good rule is to have text that seniors or low-vision customers can read at a glance. Offering adjustable text size or a zoom feature is even better . For instance, important totals or messages might be in a bold, big font so they’re easily seen across a counter.
- High Contrast Themes: Ensure a strong contrast between text and background (e.g., dark text on a light background or vice versa). High-contrast options help those with low vision or color vision deficiencies . Avoid small light-grey text that is hard to see; instead, use clear color separation (meeting WCAG contrast ratios is a good benchmark). Some systems even provide a “high contrast” toggle for users who need it, swapping to a simplified black-and-white scheme for clarity.
- Avoid Reliance on Color Alone: Never convey important information (like an order status or an error) by color coding alone. Pair colors with text or icons. For example, if an item is out of stock, don’t just highlight it in red – also display a note or symbol. This ensures color-blind users aren’t left in the dark .
- Screen Reader Support: If your customer-facing device has any interactive elements (e.g., a pay-at-table tablet or a self-order kiosk mode during idle times), consider screen reader compatibility. This means labeling UI elements properly so that blind or visually impaired users using text-to-speech can hear their order details or prompts . In practice, full screen reader support on a payment tablet might be challenging in a busy restaurant, but strides are being made – for instance, McDonald’s has added screen reader functionality to its self-order kiosks, along with wheelchair-friendly navigation . Such features allow blind customers to plug in headphones and have the kiosk read out the menu and options.
- Physical Accessibility: If using tablets or kiosks, mount them at an accessible height (per ADA guidelines, typically around 48 inches max from the floor for reach). The screen should tilt or be viewable by someone in a wheelchair. Also, ensure that any touch targets (buttons on screen) are large enough and spaced out for those with limited dexterity . For touch screens, implementing larger tappable areas and avoiding reliance on fine gestures (like drag-and-drop) makes the interface more universally usable .
- Alternative Input Methods: In some cases, providing alternative controls can be a game-changer. For example, kiosks might have a physical keypad or joystick for those who cannot use a touchscreen. While a simple customer-facing display at a counter won’t have a full control panel, it’s worth ensuring that the essential functions (like confirming a payment or entering a PIN) have an accessible mode – e.g., a customer with a tremor might prefer to have the cashier finalize the input rather than trying to hit a tiny on-screen button. Providing that flexibility as part of your training and design is important.
By incorporating inclusive design, you not only comply with legal standards but also demonstrate respect for all guests. These improvements can make the difference between someone with a disability feeling welcome at your establishment or being unintentionally excluded. Plus, many accessibility features (like clear text and good contrast) improve usability for everyone, not just those with disabilities.
Loyalty Program Integration
If your business has a loyalty or rewards program, the customer-facing display is a perfect vehicle to promote and integrate it in real time. Showing loyalty information can both reward your regulars and entice newcomers to join:
- Show Points and Rewards: Display loyalty points balance and reward status on-screen during the transaction. For example, “You have 120 points (20 points away from a free appetizer!)”. This gives instant gratification and motivation. Research shows about 50% of customers will change their behavior to reach a higher tier or reward level in a loyalty program . By showing how many points the current purchase will earn or how close the customer is to the next reward, you encourage higher spending and repeat visits .
- Indicate Member Savings: If loyalty members get discounts or special pricing, make that visible. The screen might highlight, “Loyalty Discount Applied – You saved $5.00!”, which reinforces the value of being a member. Seeing the money they saved due to loyalty status will encourage them to keep coming back . It’s an immediate positive feedback loop: “because you’re a VIP member, your coffee is free today” is a delightful message to display.
- Promote Sign-Ups: For non-members, use the idle or checkout screen to invite them to join. A subtle prompt like “Join our loyalty program to earn rewards on your next visit” can plant the seed. You could even generate a QR code on the screen that customers can scan with their phone to sign up quickly while they wait. Knowing that a loyalty program exists (and seeing others reap benefits) makes new customers 68% more likely to dine with you over competitors . A simple on-screen nudge can significantly boost enrollment.
- Tier or Status Indicators: If your program has tiers (e.g., Silver, Gold, Platinum), consider showing the customer’s tier on the screen (perhaps with a small icon or color coding that aligns with your branding). It subtly signals that you recognize their loyalty level. For example, “Thank you for being a Gold Member!” on the welcome screen personalizes the experience.
- Loyalty QR Code or Scan: Some systems allow customers to scan their loyalty card or app directly on the customer-facing display (using the device’s camera) to apply rewards. If hardware permits, this is convenient – the screen can say “Scan your app to earn points” with a live QR code scanner window. If not, simply displaying the customer’s own loyalty QR (if the POS pulls up their account) for them to scan into their phone (to check their account) can also work.
Integrating loyalty into the display makes the program highly visible and engaging. Guests are reminded of the value they’re getting (or could get), which drives repeat business. It transforms the screen from a passive receipt viewer into an active loyalty touchpoint – a strategy proven to foster customer retention .
Branding and Visual Consistency
Your customer-facing display should feel like a natural extension of your brand identity and ambiance. Rather than a generic interface, customize it to enhance branding and aesthetics:
- Brand Colors and Theme: Match the UI color scheme to your brand’s colors. If your restaurant’s theme is rustic and warm, perhaps use earth tones on the display; if it’s a modern cafe, a sleek dark or white theme might fit. Most customer display software allows customization of fonts, colors, and backgrounds – leverage this to ensure consistency with menus, logos, and décor . The goal is a seamless visual experience: the customer is looking at your brand, not just a random screen.
- Logo and Imagery Placement: Prominently feature your logo, especially on idle screens or headers. A welcome message in idle mode could include the logo and tagline. During transactions, a small logo in a corner of the display reminds the guest of your business identity in every moment. Also use high-quality images that reflect your offerings – for instance, a bakery might have a subtle background image of bread, or a bar could show a faint watermark of a cocktail. All images and animations used should reinforce the brand vibe (fun, family-friendly, upscale, etc.).
- Smooth Transitions and Animation: Add a touch of polish with subtle animations. Instead of harsh screen flips, have content fade in/out or slide gracefully. For example, when switching from idle mode to order mode, a quick animated transition (maybe your logo briefly animates or the screen slides to the new view) can make the experience feel high-tech and professional. Be cautious to keep animations subtle and fast – they should enhance, not delay, the interface. Simple effects like a short looping animation of your mascot in the corner, or an animated progress bar, can also delight the eye without being distracting.
- Content Management: Keep the content fresh and tailored. You might update the idle slideshow every few weeks with new dishes or seasonal promotions – this shows that your brand is active and dynamic. If you have multiple locations or use tablets, ensure each is updated with the latest branding assets (cloud-based CMS for digital displays can help push updates).
- Environment Matching: Consider the physical environment of the screen – is it in a chic lounge, a busy food truck, or a family diner? Adjust the display’s look and feel accordingly. For a playful family restaurant, you might use friendly cartoons or vibrant colors; for an elegant bar, a minimalist design with ample negative space might be better. Also, use screen brightness and a screensaver appropriately: for example, dim the screen slightly in a low-light cocktail bar to avoid an overly harsh glow, possibly using a darker theme at night.
With thoughtful branding on the display, you not only reinforce brand recognition but also make the technology feel integrated into the hospitality experience. Guests will remember the cohesive atmosphere – the screen becomes another touchpoint that tells your brand’s story (and not just a utilitarian device). As TouchBistro notes, these displays are essentially a form of digital signage and should be treated as valuable real estate for your brand message .
Interactive Features and Feedback Opportunities
Many customer-facing screens today have touch capabilities, opening the door for direct guest interaction. Even simple interactivity can significantly improve engagement and provide value. Here are some interactive features to consider:
- Easy Tip Selection: Tipping is a critical part of the payment flow in many regions. Use the customer display to present suggested tip amounts (e.g., buttons for 15%, 20%, 25% or “No Tip”) in a clear, friendly way. This not only simplifies the process for customers but can also boost tips for your staff . For instance, upon payment, the screen can say “Would you like to leave a tip?” with large preset buttons – this has been shown to increase tip frequency and size because it gently prompts the guest and makes adding a tip as easy as a tap . Ensure the interface is polite and allows opting out (e.g., an easy “No Tip” or custom tip option) to avoid pressuring the customer.
- Digital Signature or Consent: If needed (for receipts or cards), the touch screen can let customers sign digitally. This is standard for many tablet POS systems – the signature is captured on the customer-facing tablet, streamlining the checkout. Just make sure the signature box is large enough and responsive.
- On-the-Spot Feedback: Implement a quick feedback prompt at the end of a transaction. This could be as simple as a thumbs-up or thumbs-down, a 5-star rating, or a short emoji-based survey (“How was your experience today? 🙂 😐 🙁”). Because the customer is still present and the experience fresh in their mind, you may get more accurate feedback. Keep it optional and brief – one tap – so it doesn’t hold up the line. Over time, these micro-surveys can alert you to issues or successes. For example, a pattern of low scores at certain times might indicate a service issue that needs addressing.
- Email/Text Receipt Entry: Allow customers to input their email or phone for a digital receipt or to join a mailing list right on the customer display (if the screen is accessible). Many POS systems do this: after payment, the screen asks if the customer wants the receipt emailed, and if so, they can type their address. Ensure the on-screen keyboard is large and that an alternative (like printing or skipping) is readily available for those who don’t want to use it. This feature not only is convenient but can help build your customer contact list (with consent).
- Loyalty Sign-In or Enrollment: Tying back to loyalty integration – if the screen allows, let existing loyalty members check in (e.g., by entering a phone number or scanning a QR code on their app). Or let new users quickly enroll by entering minimal info. For touch displays, a virtual keyboard or numeric pad can facilitate this. The key is to make it quick: perhaps just a phone number to link to their new account. Any longer process should be kicked to a URL/QR code for the customer to complete later on their own device to avoid bogging down the checkout.
- Post-Transaction Engagement: After the sale, you might use the screen to ask if the customer wants to do something interactive. For instance, “Tap to play our weekly giveaway” or “Vote for our next special flavor!”. These are more experimental, but some businesses use their tablet screens for simple games or polls once the payment is done (especially if the device will otherwise just revert to idle mode while the customer is still present). One caution: only do this if you’re not busy, as you don’t want to cause a queue – it’s more suitable for kiosks or slower periods. But a quick “spin the wheel” for a chance at a discount on a future visit could be a fun touch that leaves a lasting positive impression.
- Safety and Privacy Considerations: Any interactive element must respect privacy. For example, if collecting emails or feedback, assure customers their info is safe (a short privacy note or icon is a good idea). Also, have a timeout – if the customer walks away, the screen should clear any personal data after a short while.
When thoughtfully implemented, interactive features can make the customer feel truly part of the process rather than a passive participant. Even something as simple as selecting their own tip or giving a quick rating gives a sense of control and engagement. In practice, businesses have found that a user-friendly display with interactivity leads to higher tips, more sign-ups, and actionable feedback, all while keeping the experience fun and efficient .
Minimizing Perceived Wait Time and Entertaining Guests
One of the subtle but powerful benefits of a well-designed customer-facing display is its ability to reduce the psychological weight of waiting. By providing something interesting to look at or do, the display can make time seem to pass more quickly for waiting guests. Here’s how to leverage it to delight and distract:
- Engaging Idle Content: Don’t let the idle mode just show a blank screen or simple logo – use it to display content that entertains. This could be a slideshow of beautiful food photography, behind-the-scenes glimpses of your kitchen or team, or fun facts about your cuisine (e.g., “Did you know our pizza dough ferments for 48 hours?”). Some restaurants incorporate trivia questions or quirky facts on their waiting screens. For example, a BBQ joint might show “BBQ Fact: The longest cookout lasted 48 hours!” to amuse guests. Occupied minds are less likely to dwell on the wait, and research confirms customers perceive waits as shorter when they have something to engage with .
- Message of the Day & Social Feeds: Update the display with a “message of the day” or daily special, paired with an eye-catching graphic . It could be a welcome note (“Happy Friday! Thanks for joining us.”) or a note from the chef about a new dish. Additionally, consider showing your latest Instagram posts or a feed of positive customer testimonials/tweets (with moderation). Highlighting your social media can entertain guests and even prompt them to follow you – it’s a captive audience at the counter . Seeing a stream of appetizing Instagram photos or a TikTok of a new menu item can keep customers busy and excited.
- Visual Order Progress: We mentioned real-time statuses earlier; here we note that a visual progress bar or animation while preparing an order can also reassure customers. Even if not 100% literal, a small animation (like a coffee cup filling up, or a burger assembling in stages) provides a sense of progress and distracts from the clock. It’s the same idea as the loading animations on apps – psychologically, it’s better than staring at nothing.
- Light Entertainment: Depending on your venue, you might play short silent videos (with captions) – for example, a smoothie bar could show a quick video of fruits being blended with fun facts popping up. Or a sports bar might display the current game scores/ticker on part of the screen during idle mode. Another idea is a local community board – upcoming events or partnerships, which can be interesting for guests to read. The content should be positive and on-brand; avoid anything that could be controversial or overly distracting (you still want them to focus when needed).
- Customer Spotlights: A creative idea some establishments use: display user-generated content or thank-you messages. E.g., “Thanks for visiting, John! Enjoy your meal.” if the system knows the customer’s name from loyalty, it can personalize a brief message. Or show a mosaic of customer selfies (with permission) enjoying their food. People love seeing themselves or relatable others on screen – it creates a connection and makes the wait feel more social and fun.
- Gamified Waiting: In scenarios with longer waits (like a busy brunch spot where lines form), a touch-enabled kiosk might include a simple game (think along the lines of a scratch-off card on the screen to win a discount, or a quick puzzle). If your hardware and queue allow it, this can be a memorable touch that turns waiting into a mini-activity. For example, “While you wait, play our Coffee Quiz – win a free topping!”. Keep games extremely short and easy to avoid frustration and ensure they can be abandoned once the service proceeds.
The overarching principle is to distract from boredom and reward the customer’s attention. By the time their order is ready or payment is done, they feel the wait was shorter than it actually was . This not only improves immediate satisfaction but also increases the likelihood they’ll return (since waiting wasn’t painful). A well-engaged customer is often a happier, more patient customer. And as one study noted, even a small reduction in perceived wait time can have a meaningful impact on a restaurant’s bottom line due to improved customer retention .
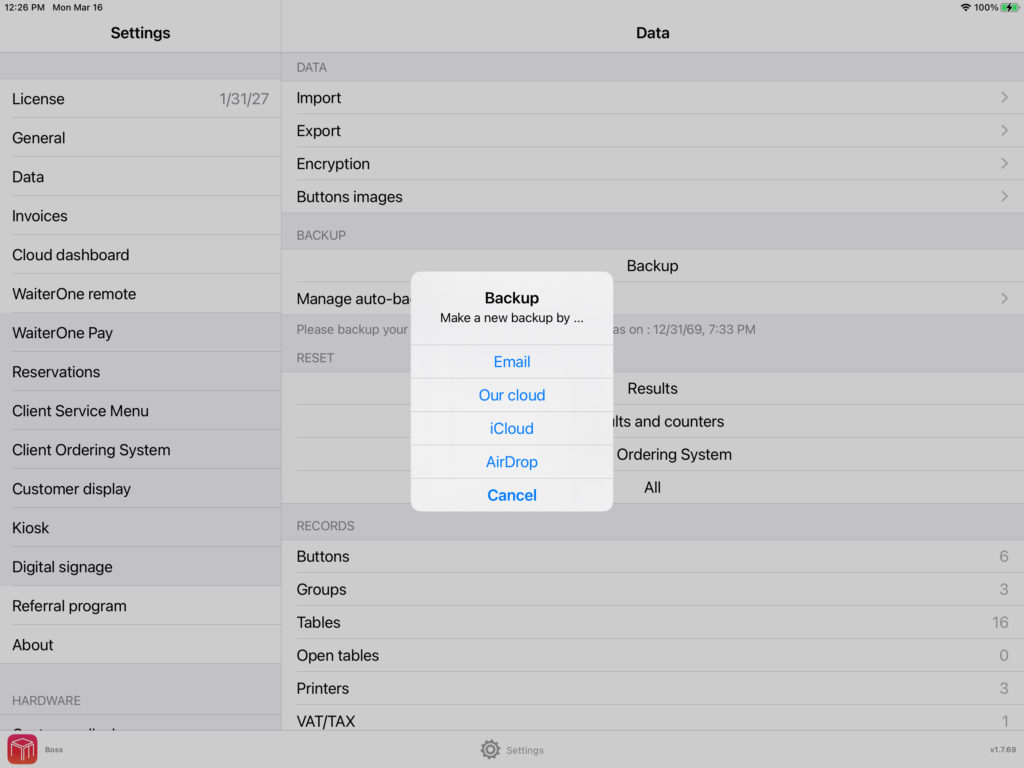
Hardware and Implementation Considerations
All these features should be implemented with an eye on the practical hardware used in hospitality settings – whether it’s an iPad at the counter, an Android tablet, or a purpose-built browser display. Here are some tips to ensure your setup supports the enhanced experience smoothly:
- Device Compatibility: Modern POS systems like Square, Toast, and TouchBistro often use off-the-shelf tablets for customer-facing displays . Ensure your software runs reliably on the chosen platform (iOS, Android, or Windows). For web-based displays, use a fullscreen browser kiosk mode. Test the interface on various screen sizes (e.g., a 10″ iPad versus a 15″ Android tablet) and orientations (portrait vs. landscape) to confirm everything remains readable and well-scaled. Responsive design is key if using a web app.
- Kiosk Mode and Reliability: Configure tablets in a kiosk mode (Guided Access on iPad, or pinning an app on Android) so that customers cannot exit the app or see system pop-ups. Disable any notifications or distractions on that device. The device should boot directly into the display app and ideally auto-recover if it crashes. Nothing kills the vibe like a Windows error dialog or a home screen appearing on what should be a dedicated customer display.
- Network and Offline Handling: If your display content is cloud-powered or needs network (for pulling down promotions or being in sync with order status), plan for intermittent connectivity. Cache key information (like the last menu, or a default idle slideshow) so that even if Wi-Fi blips, the screen can continue to show useful content (rather than a blank screen or loading icon). If using devices like iPads, ensure a strong and stable Wi-Fi signal at the counter and consider using enterprise profiles to keep them connected to the right network.
- Power and Placement: These devices need to remain powered through long shifts. Use secure wiring or charging docks so that the screen doesn’t die mid-service. For example, many setups have the tablet physically mounted on a stand that also charges it. Hide cables for both aesthetics and safety. Additionally, position the screen for optimal customer visibility – angled toward the customer at a comfortable viewing angle. Glare can be an issue outdoors or near windows, so consider anti-glare screen protectors or shade for food truck deployments. High-brightness screens might be necessary in sunlight.
- Durability: In a restaurant environment, spills and knocks happen. Use cases or mounts that protect the hardware. If using consumer tablets (like an iPad), invest in a sturdy enclosure (often metal or heavy-duty plastic) that is tamper-proof and possibly lockable (to prevent theft of the tablet). For example, many iPad-based POS systems come with locking stands. Also consider a waterproof or water-resistant case if the device might be exposed to rain (food trucks) or liquids at a bar.
- Maintenance: Develop a routine to keep the displays running smoothly. This includes cleaning the screen regularly (smudges and grease can make it hard to read), rebooting devices during off-hours to prevent memory bloat, and applying software updates in a timely manner. Have spare devices or a backup plan in case a unit fails – you don’t want to lose the customer-facing functionality during a rush.
- Performance Optimization: Fancy animations and high-resolution slideshows are great, but ensure the device can handle them. Test the CPU/Memory usage of your content on the actual hardware. If you notice lag, simplify the visuals or transitions. The experience should be snappy – customers will only be glancing at the screen for short periods in many cases, so any delay in updating info (like an item appearing after it’s rung in) could cause confusion. Aim for real-time mirroring of the POS input with minimal latency.
- Security: Since these displays might show sensitive info (like prices, or even a QR code for payment), make sure the data is secure. The device should be locked down so that customers cannot, for example, swipe down to notification center or other apps. Also, if the display shows any personal info (like names for order pickup or loyalty info), ensure you’re following privacy best practices – first name and last initial is safer than full name to display in public, for instance. Regularly check that your customer-facing content doesn’t accidentally expose something it shouldn’t.
Considering these hardware factors is important to translate great features into a great experience. A beautifully designed display feature that lags or a tablet that keeps rebooting will frustrate both customers and staff. Real-world successful implementations, such as the Square Register’s customer display, were built with dedicated hardware and software working in harmony . Even if you’re using consumer tablets, treating them like professional appliances – with proper mounting, maintenance, and software care – will ensure your customer-facing display truly enhances the guest experience day in and day out.
Conclusion
Customer-facing displays in restaurants and hospitality venues have evolved from simple order viewers to multifaceted customer experience hubs. By implementing real-time order status updates, dynamic promotions, multi-language support, accessibility features, loyalty integration, strong branding, interactivity, and engaging content, you transform a basic screen into a powerful tool for guest satisfaction and sales growth. These best practices are drawn from what real-world operators have found effective – from fast-food chains using order-ready boards to small cafes leveraging iPad displays for loyalty and upselling. The overarching theme is to keep the customer informed, engaged, and entertained at every stage: idle, ordering, and payment.
When done right, a customer-facing display can reduce errors, build trust through transparency, encourage extra purchases, and make waiting enjoyable – all of which contribute to a better overall impression of your business . In a competitive hospitality landscape, such details in customer experience can set you apart. As you implement these enhancements, gather feedback from both customers and staff; continually refine the content and features to best suit your unique environment and audience.
Ultimately, the goal is a win-win scenario: guests feel looked after and engaged, and you benefit from smoother operations and increased loyalty. A thoughtfully optimized display is more than just a screen – it becomes an integral part of your service that delights customers and keeps them coming back for more.
Sources:
- Priority Commerce – Benefits of Customer Facing POS Displays
- Pej (2023) – Order Ready Boards to Keep Customers in the Loop
- TouchBistro – POS Customer Displays for Upselling and Loyalty
- TPGi (2023) – Accessible Kiosk Design Guidelines
- NRS Plus – Customer Screen Promotions and Loyalty Savings
- Square (2022) – Customer Display Overview
- Cervion Systems – Tips and Promotions on Customer Displays